Preparing for the migration from ownCloud to Nextcloud#
LCSB ownCloud (owncloud.lcsb.uni.lu) is being replaced by LCSB Nextcloud. All files stored on LCSB ownCloud are moved to LCSB Nextcloud automatically. You don’t need to upload them again.
This How-to Card is for users who synchronized LCSB ownCloud with the ownCloud desktop client (on macOS, Windows or Linux). It explains how to prepare for the migration. If you only used ownCloud in the browser, you don’t need to prepare anything.
When does the migration take place?#
- Starting around 4 pm on the 23rd of November (23.11.), LCSB ownCloud (
owncloud.lcsb.uni.lu) becomes unavailable. The files on the ownCloud server are backed up and migrated to LCSB Nextcloud. - Starting on the afternoon of 24th of November (24.11.), LCSB Nextcloud becomes available. The exact time will be communicated.
Only the files that are on the ownCloud server before 4 pm on the 23rd of November (23.11.) are migrated to Nextcloud. Unsynchronized local changes only exist on your computer and are not moved. Therefore, follow the steps below no later than around noon on the 23rd of November (23.11.). Consider checking your ownCloud client synchronisation status already a few days in advance, to ensure there is time to fix issues and request for support if needed.
If you don’t want to be interrupted by the migration at all, copy your files to OneDrive, SharePoint or Teams. Once the migration is finished, you can upload them to Nextcloud again.
After the migration, a separate How-to Card will guide you through setting up the Nextcloud desktop client.
Terms used in this card#
ownCloud client: the ownCloud desktop application. To open its window:
- macOS: click the ownCloud icon in the menu bar, at the top right of your screen.
- Windows: click the ownCloud icon in the notification area, at the bottom right of the taskbar (possibly hidden under ^).
- Linux: click the ownCloud icon in the system tray / notification area of your desktop, then click Show ownCloud.
macOS (similar on Windows):

Linux:

LCSB account: the accounts connected in the ownCloud client are listed at the top left of the ownCloud client window (on Linux: in the top bar, next to Add account). The LCSB account is the one with the server address owncloud.lcsb.uni.lu. Whenever this card says “select the LCSB account”, click this entry.
macOS (similar on Windows):

Linux:
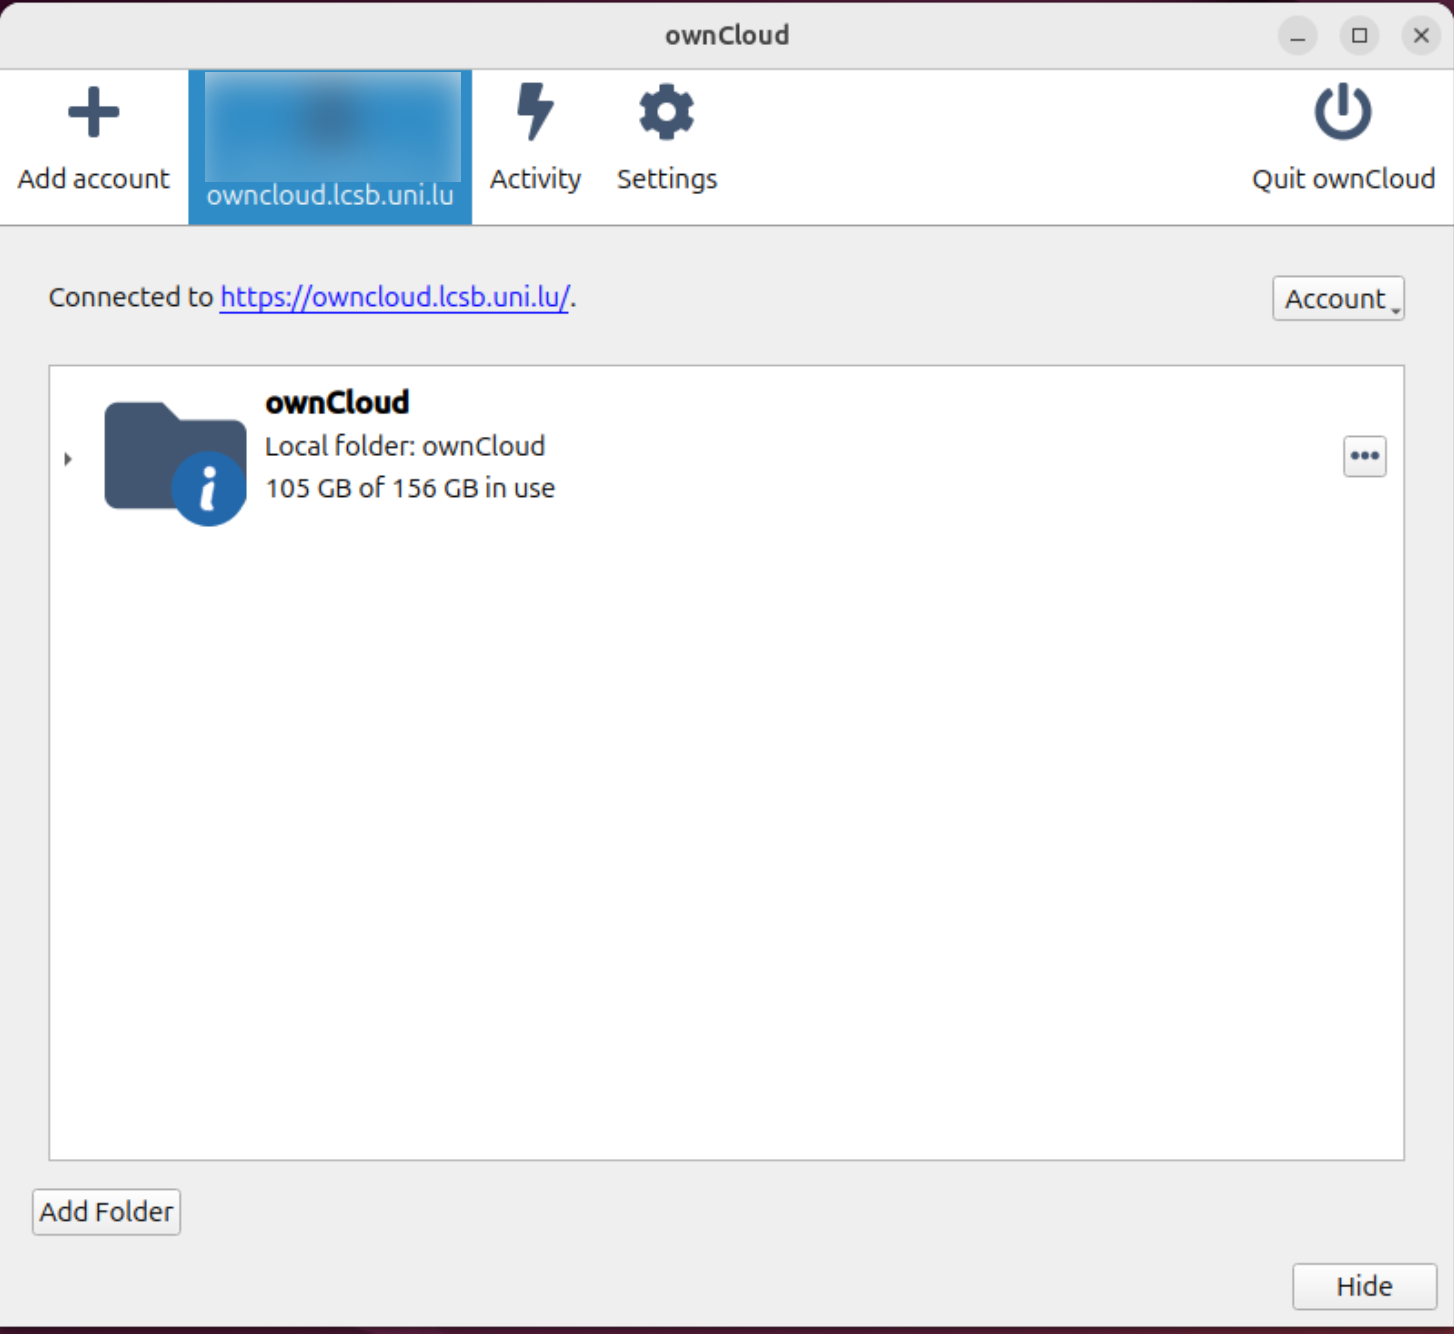
ownCloud folder: the folder on your computer that is synchronized with the LCSB ownCloud server. It is usually:
- macOS:
/Users/<your username>/ownCloud - Windows:
C:\Users\<your username>\ownCloud - Linux:
/home/<your username>/ownCloud
If you chose another location, select the LCSB account in the ownCloud client: the path of your ownCloud folder is shown in the folder sync connection entry.
If your client connects to multiple servers, there are multiple ownCloud folders on your computer (typically one
ownCloudand othersownCloud_<some_suffix>, or custom names you chose during setup). Make sure to identify the one that is synchronized with the LCSB ownCloud server before proceeding.- macOS:
Stop editing and synchronize everything with ownCloud#
Do the following steps no later than around noon on the 23rd of November (23.11), while LCSB ownCloud is still available. In these steps, you make sure that all your files and changes are on the ownCloud server.
Stop editing your ownCloud files now
Close all files opened from your ownCloud folder. Prevent any further edits to files in your ownCloud folder.
If you have Cryptomator vaults in your ownCloud folder, lock them.
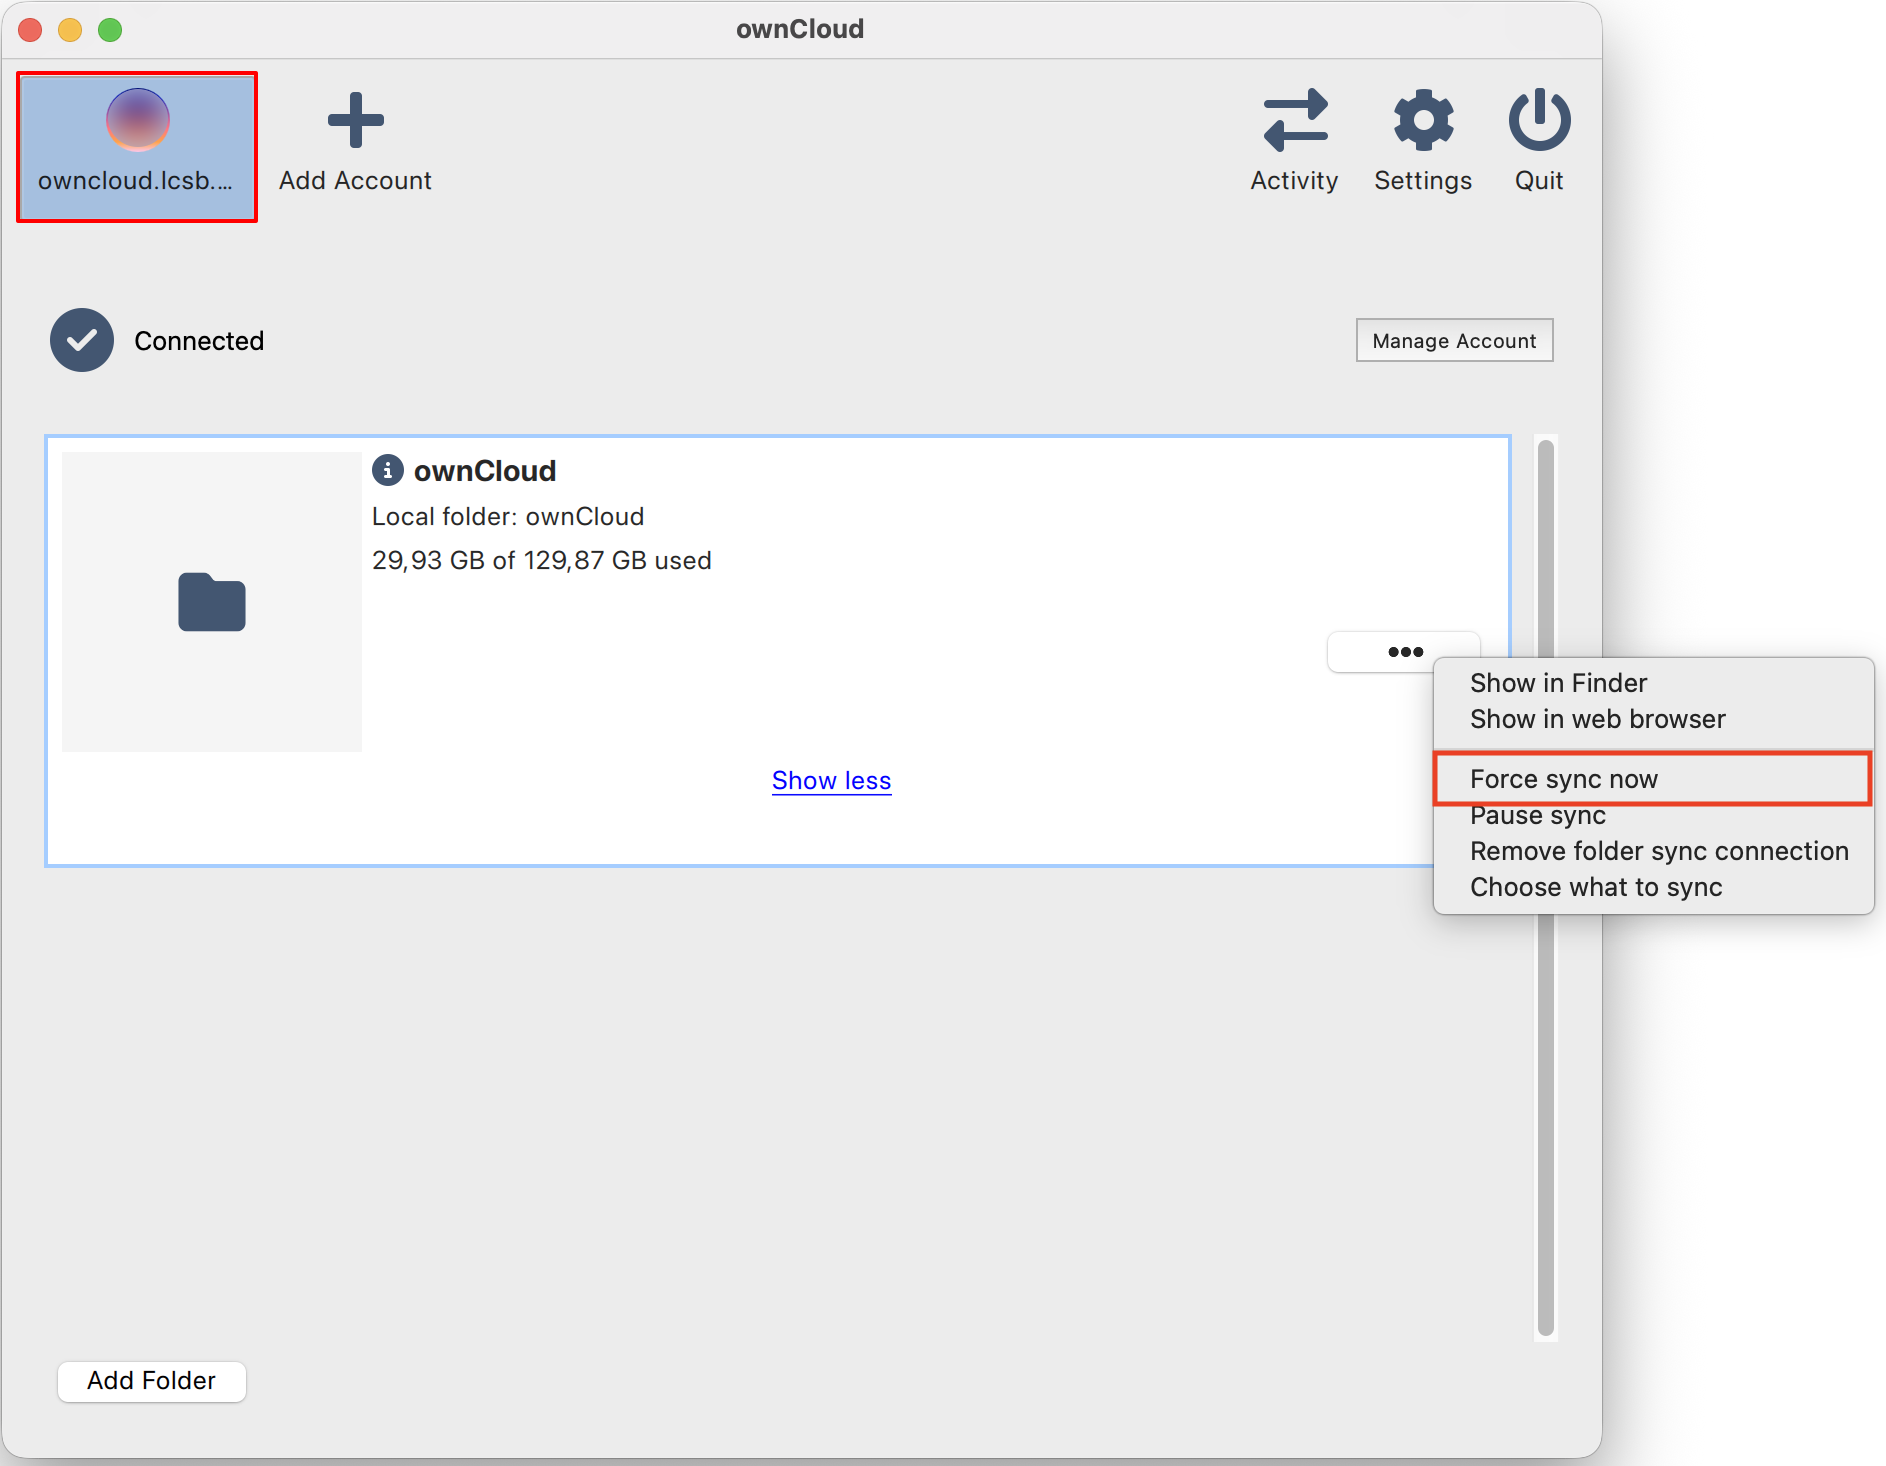
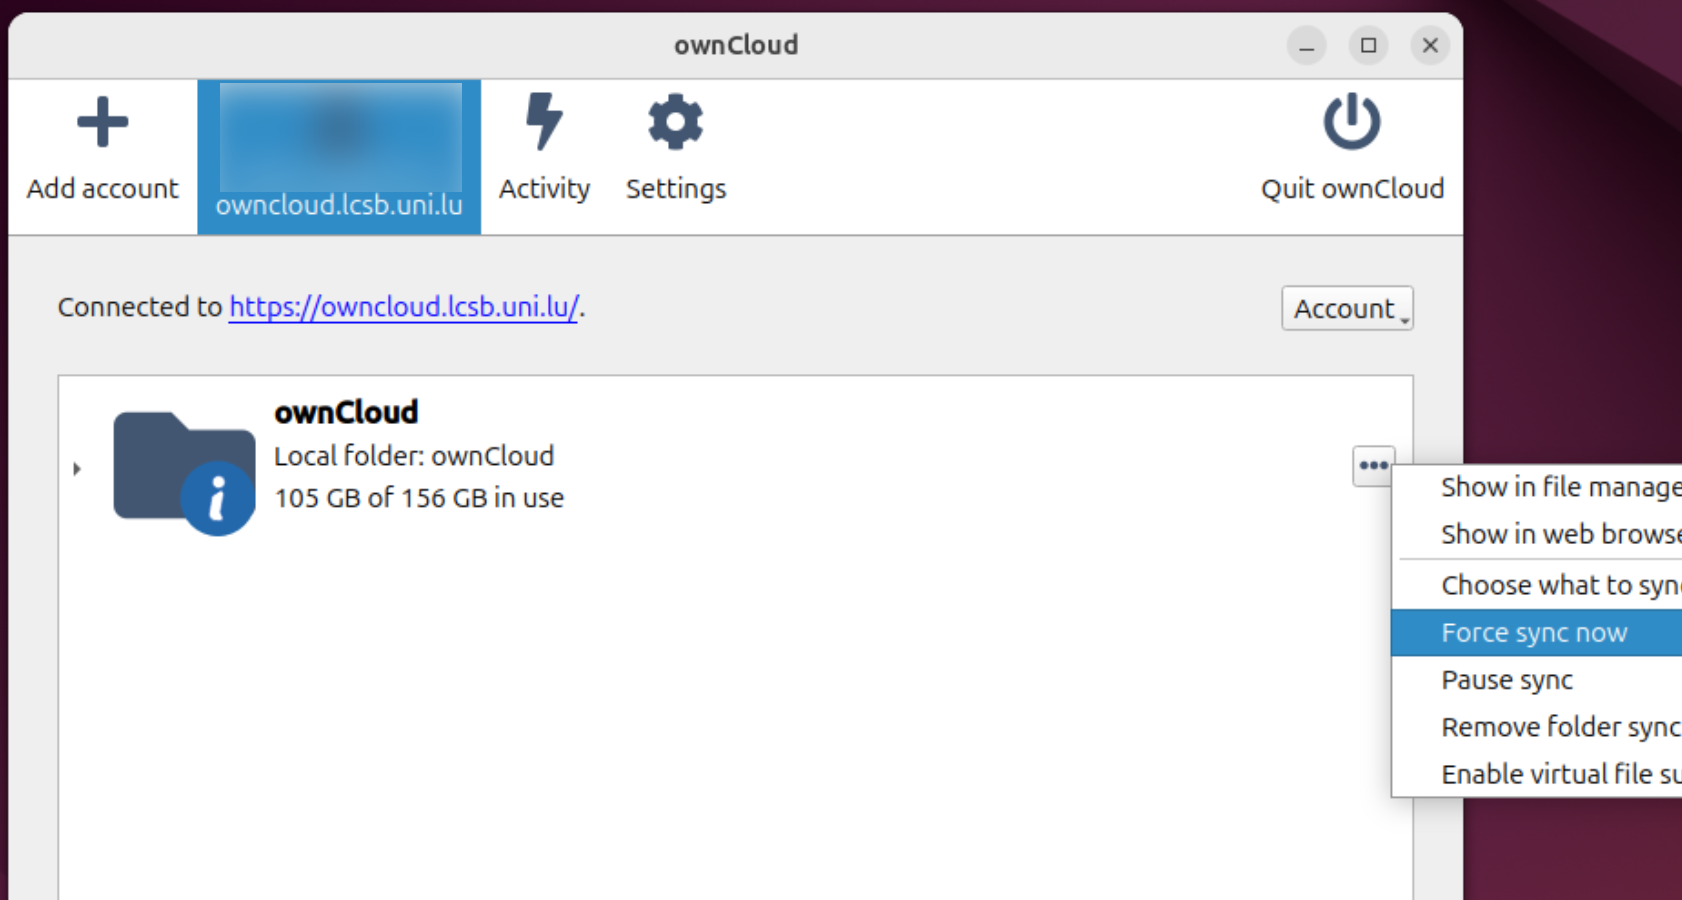
Open the ownCloud client and select the LCSB account. Click the ellipsis (
...) next to your folder sync connection and select Force sync now. If you have several folder sync connections, do this for each of them.macOS (similar on Windows):
Linux:
Wait until the synchronization is complete.
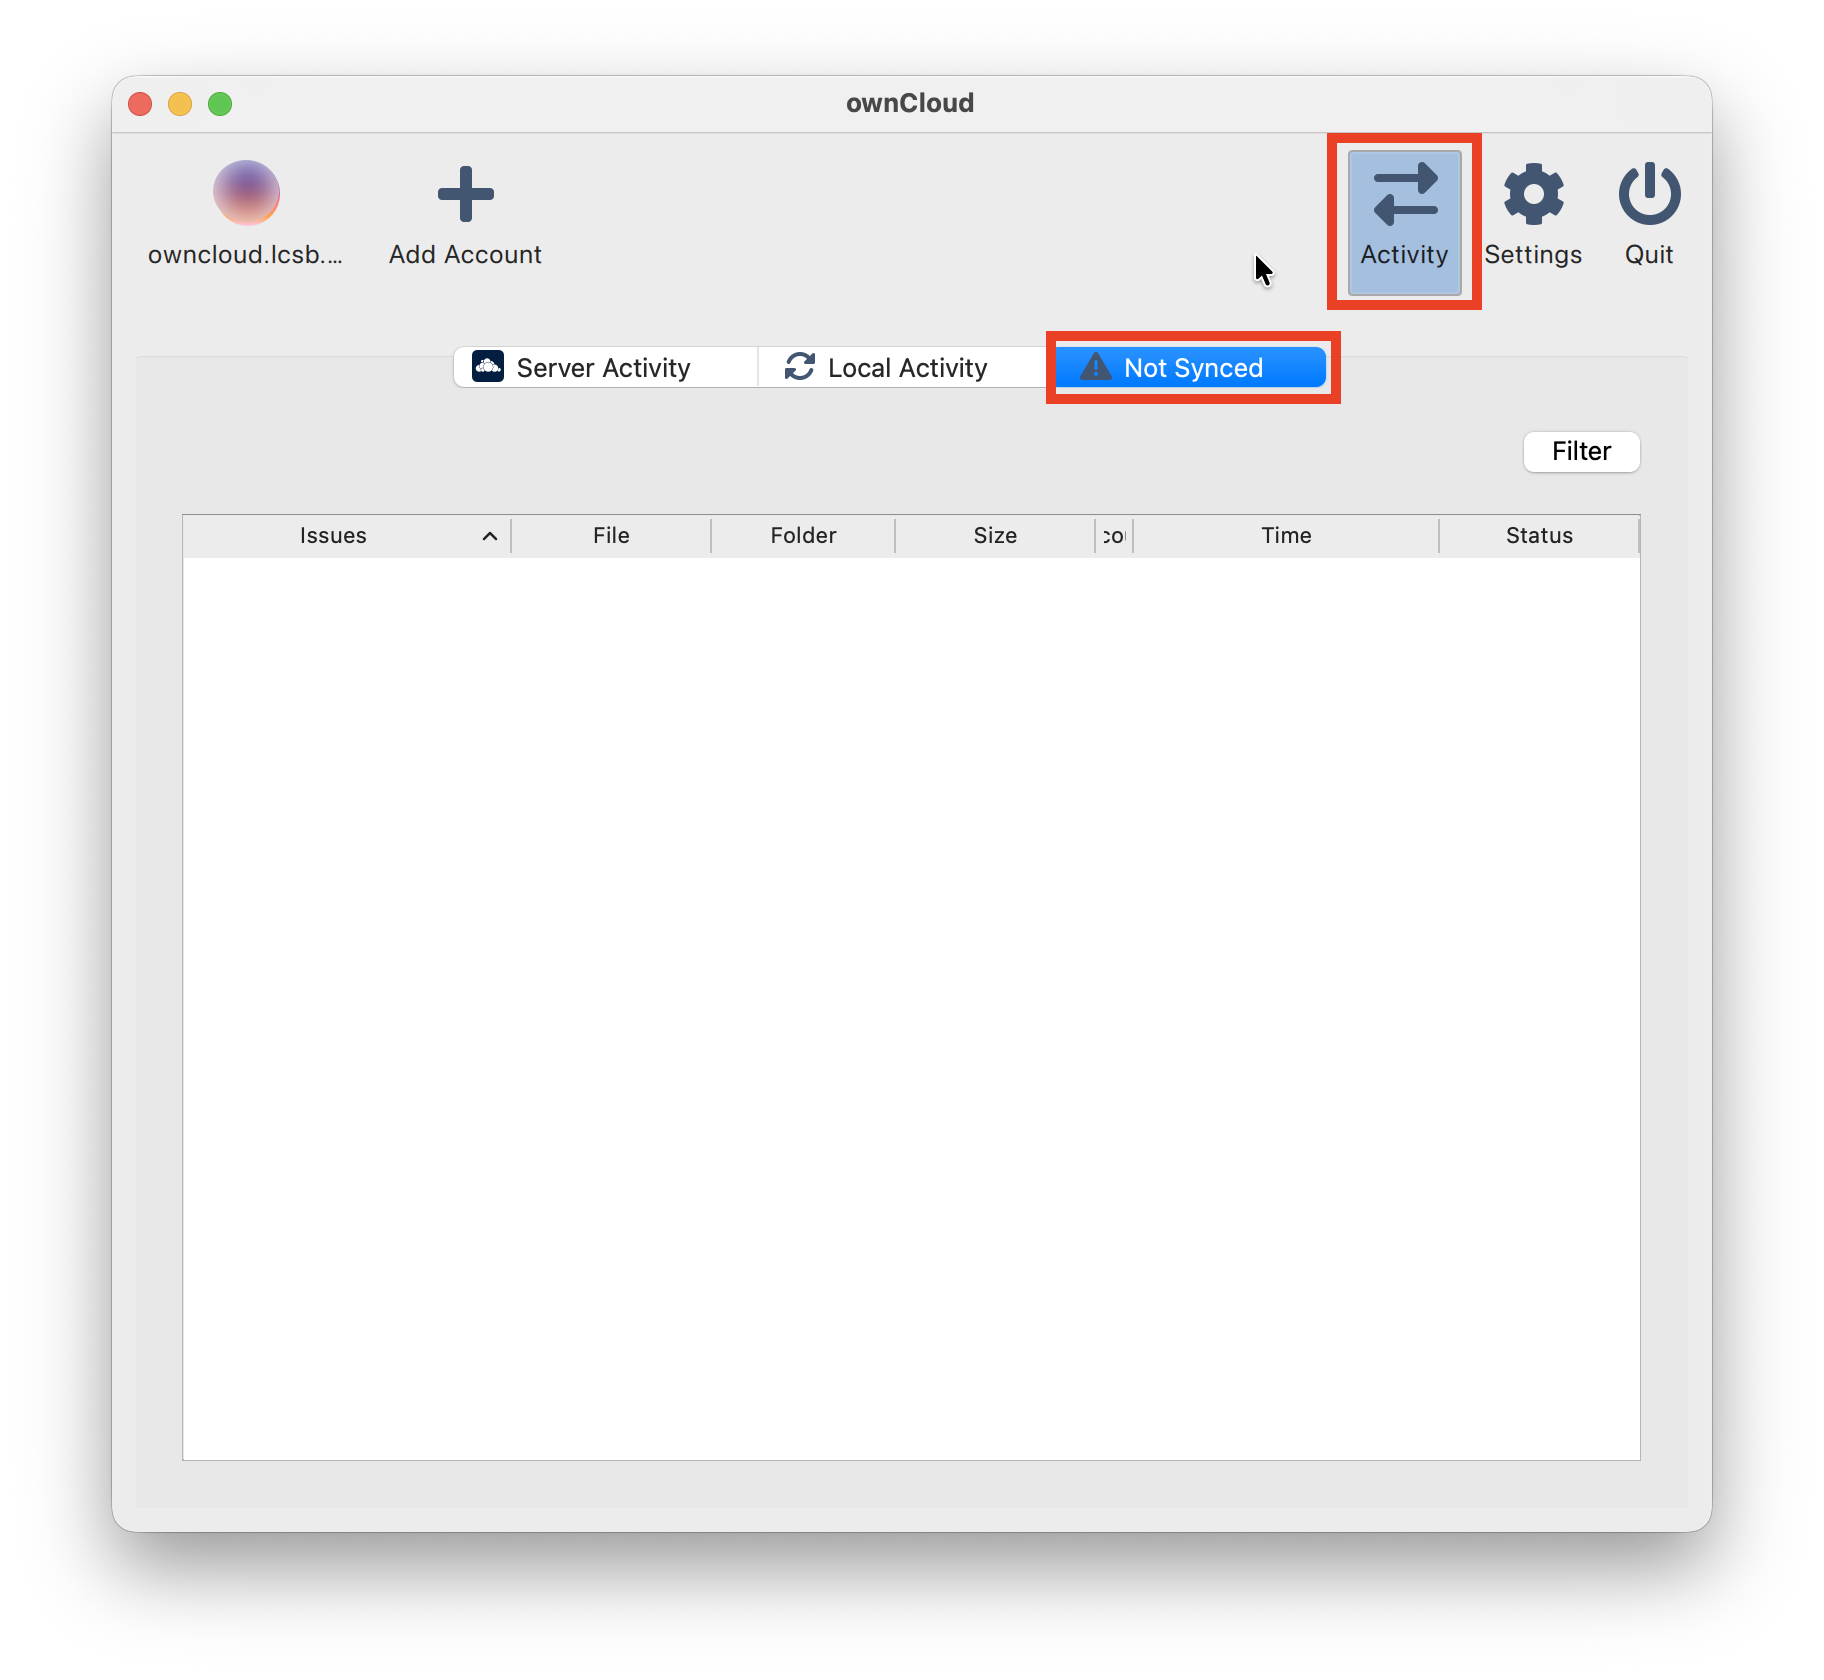
Go to Activity > Not synced. This list must be empty, or only contain files that you don’t want to synchronize (e.g.
.DS_Storefiles on macOS,desktop.inifiles on Windows). Files listed here are not correctly synchronized with the ownCloud server.macOS (similar on Windows):
Linux:
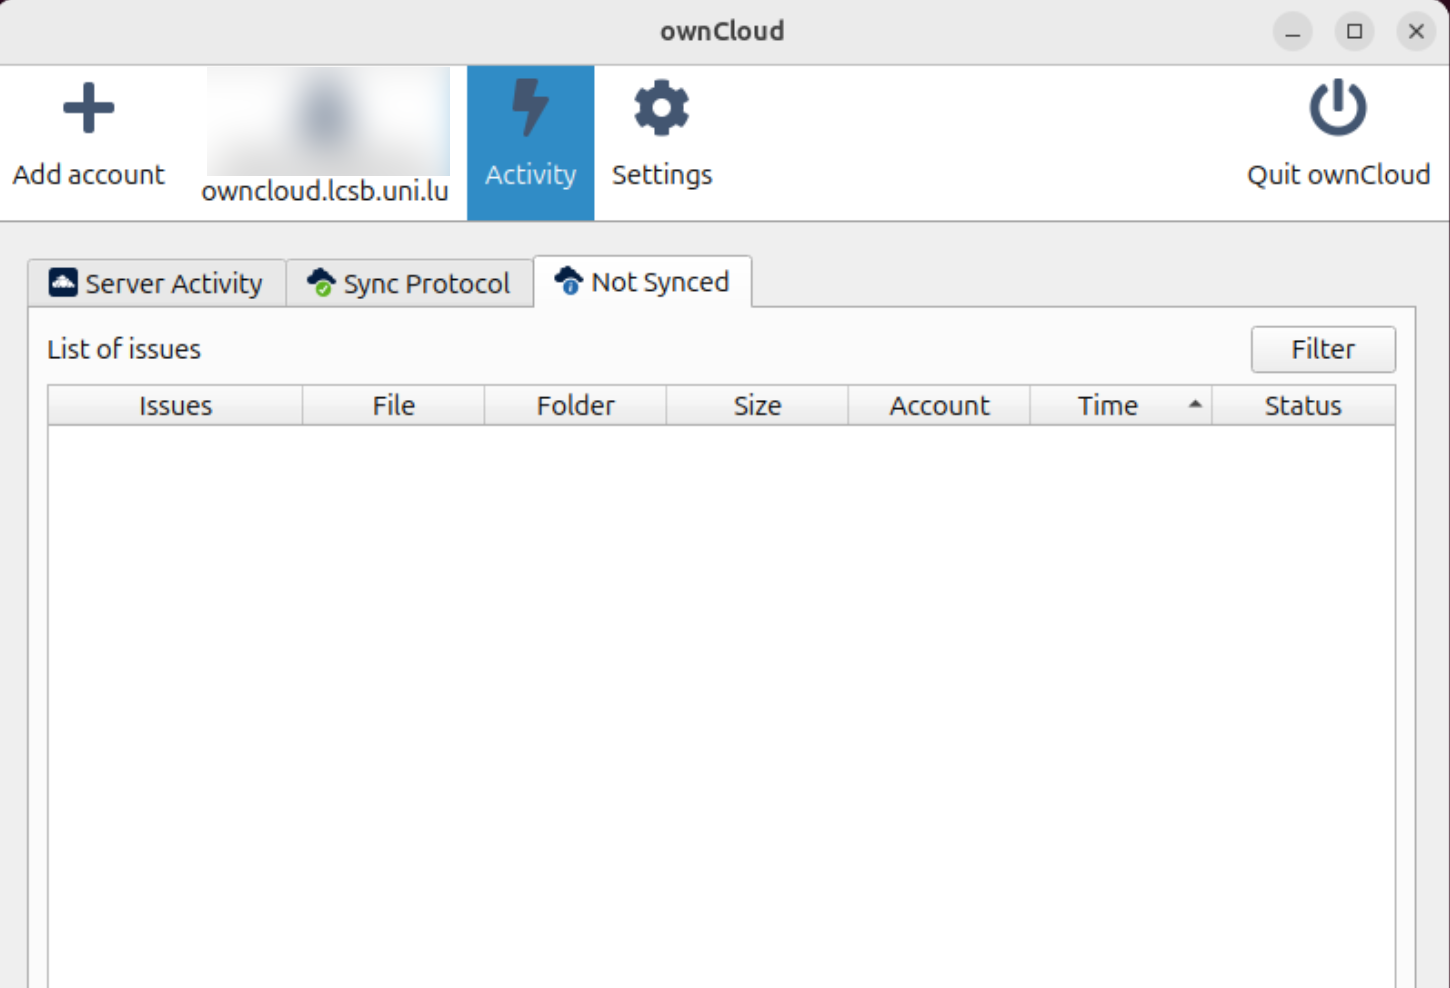
Common reasons why a file is not synchronized:
- The file name contains characters that are not allowed. Rename the file.
- The file is too large.
- The file matches an ignored pattern, e.g. temporary files. These files are never synchronized and you can usually ignore them.
For each listed file, fix the issue and click Force sync now again. Otherwise, copy the file to a location outside your ownCloud folder and upload it to Nextcloud after the migration.
Note: selective sync
If you excluded folders from synchronization in the ownCloud client, these folders are on the server but not in your ownCloud folder. They will be available on Nextcloud. You do not need to do anything.
Windows with virtual files: back up your downloaded files#
If you are on macOS or Linux, you don’t need to back up anything: continue with You are now ready for the migration. On Windows, first check your synchronization mode below.
How to check your synchronization mode (Windows)#
The ownCloud client on Windows can synchronize in two modes:
- Classic sync: all files (or the folders you selected) are downloaded to your ownCloud folder.
- Virtual files: all files are visible in your ownCloud folder, but a file is only downloaded when you open it.
To check which mode you used:
- Open the ownCloud client: click the ownCloud icon in the notification area, at the bottom right of the taskbar (possibly hidden under ^).
- At the top left, select the account with the server address owncloud.lcsb.uni.lu.
- Click the ellipsis (
...) next to your folder sync connection. - Look at the menu:
- It shows Disable virtual file support: you used virtual files. Continue with Back up your downloaded files.
- It shows Enable virtual file support, or no such option: you used classic sync. You don’t need to back up anything: continue with You are now ready for the migration.

If you have several folder sync connections, check each of them. Follow Back up your downloaded files for each connection that uses virtual files.
Back up your downloaded files#
With virtual files, only the files you opened or marked as Always keep on this device are stored on your computer. All other files exist only on the server. After the migration, the virtual files are removed from your computer, so you have no local backup copy. To keep one of the files that are stored on your computer, copy them to a backup folder before the migration, after you have synchronized everything as described above:
Create a new, empty folder outside your ownCloud folder, e.g.
C:\Users\<your username>\ownCloud-backup.Open your ownCloud folder in File Explorer. The Status column shows where each file is stored:
- Green check mark (filled or outlined): the file is stored on your computer.
- Cloud icon: the file is only on the server.
Copy the files and folders with a green check mark to your backup folder (select them, press Ctrl + C, open the backup folder and press Ctrl + V).
Do not copy files with a cloud icon. Copying them downloads them from the server, which can take a long time and use a lot of disk space. These files are migrated to Nextcloud anyway.
Keep your backup folder until you have checked, after the migration, that all your files are available on LCSB Nextcloud. Then delete it.
You are now ready for the migration#
Leave the ownCloud client and your ownCloud folder as they are: do not uninstall the ownCloud client and do not delete or move your ownCloud folder until further notice. You need them after the migration. Until then, do not edit the files in your ownCloud folder.
Support#
If you encounter any issues, create a ServiceNow ticket. In the Application field, select owncloud.