You are viewing the public, limited version of the How-to Cards. Connect to the University network physically or via VPN to see all cards.
Card categories
Outline
Last modification
2024-02-29
Backup of Staff Computer - External Disk#
macOS#
macOS platform comes with Time Machine, a very easy to use backup feature. Time Machine backups can be set up as follows:
- Connect an external disk to your computer.
- Using Finder open up /Applications/System Preferences and Select Time Machine.

- From the Time Machine main screen click Select Backup Disk.

- From the list select your external disk. It is also recommended that you select the option to encrypt backups.

- If you opt for encryption you will be asked for an encryption password. You will need this password whenever you re-connect the disk to your computer or whenever you restart your Mac. You should keep this password safe using Password Management software.

- Time Machine requires an apple-specific disk format to work. Your external disk may not be in this format (e.g. may be in exFAT format which is accessible both by Windows and Mac). In such a case Time Machine will prompt you to approve the erasure and re-formatting of your external disk (see below). If you do not want to re-format, you may create a disk image on your external disk and then point Time Machine to this image.

- After you select a backup disk, provide password and confirm disk format (if applicable), Time Machine will automatically start the backup process in the background. You may continue to work. You will receive a notification, when the first backup is complete.

- If you want to initiate another backup manually, click the Time Machine logo in your menu bar and select Back Up Now. It is recommended that you enable the automatic backup feature of Time Machine. To do so, go to /Applications/System Preferences/Time Machine and select the option Back Up Automatically.

Official instructions for restoring your Mac using a Time Machine backup can be found here.
Windows#
Windows’s offerings for backup has different names in different versions.
- Microsoft Backup and Restore, which is available in Windows 7 and Windows 10, allows backup of your entire system or selected folders/files on your computer.
- File History, which is is available in Windows 8 and 10, provides an easy to use option with which you can backup select files/folders. File History runs periodically, tracks versions of your files, and allows you to go back older versions.
Before creating a backup, make sure that your backup drive is encrypted as a safety measure in case of disk loss or theft (see How-to Card on disk encryption).
The steps to switch File History on your computer is as follows:
- Connect an external disk to your computer.
- From the Start menu select Settings/Update & Security/Backup.

- Click the “+” next to Add a drive. You’ll see a prompt to choose an external drive, choose the disk you have connected.
- File History has now started archiving your data. An on/off slider will now appear under a new heading called Automatically back up my files.

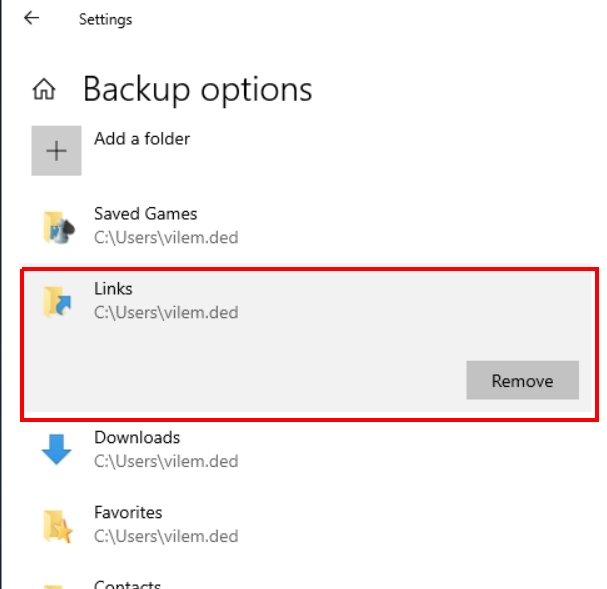
- By default, Windows 10’s File History will back-up all the folders in the User folder. And it will run the backup on an hourly schedule. To change any of those settings click on More options under the on/off slider (see below).

- In the Backup Options dialog, under the Back up these folders, you can remove existing folders and add new ones. IMPORTANT NOTE Make sure that any application that read/write your data files/folder are closed, when you’re making this File History configuration.
The instructions for restoring your files from File History can be found here.