Encrypting the Startup Disk for Your Laptop/Desktop#
Encrypting an entire hard disk is an effective protective measure against computer theft and loss. This How-to card provides instructions for switching on disk encryption on macOS and Windows platforms.
IMPORTANT NOTICE: One important requirement of using encryption is that you must manage your encryption passwords/keys. Failing to do so will mean loosing your data indefinitely. Please visit the following How-to Card for a list of password management tools. Ensure that you have arranged for password management before starting the encryption of data.
macOS#
The disk encryption feature of macOS is called FileVault. When you switch FileVault on for the first time, it will initially encrypt all of your existing data, and then it will ensure all new data is encrypted. The steps to enable FileVault are as follows:
- Using Finder open up /Applications/System Preferences and Select Security & Privacy, then select the FileVault tab. If you have not enabled FileVault already, you should see the following
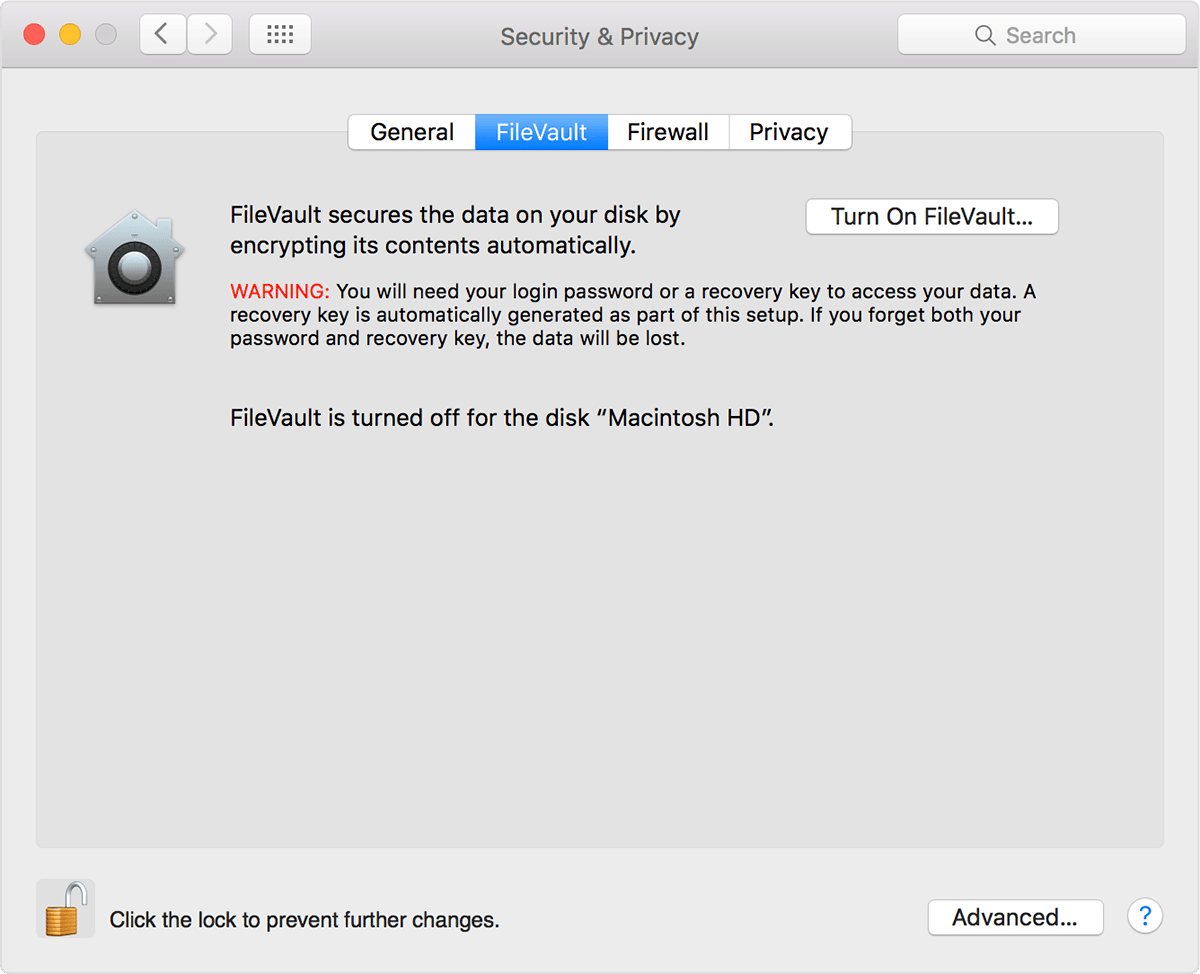
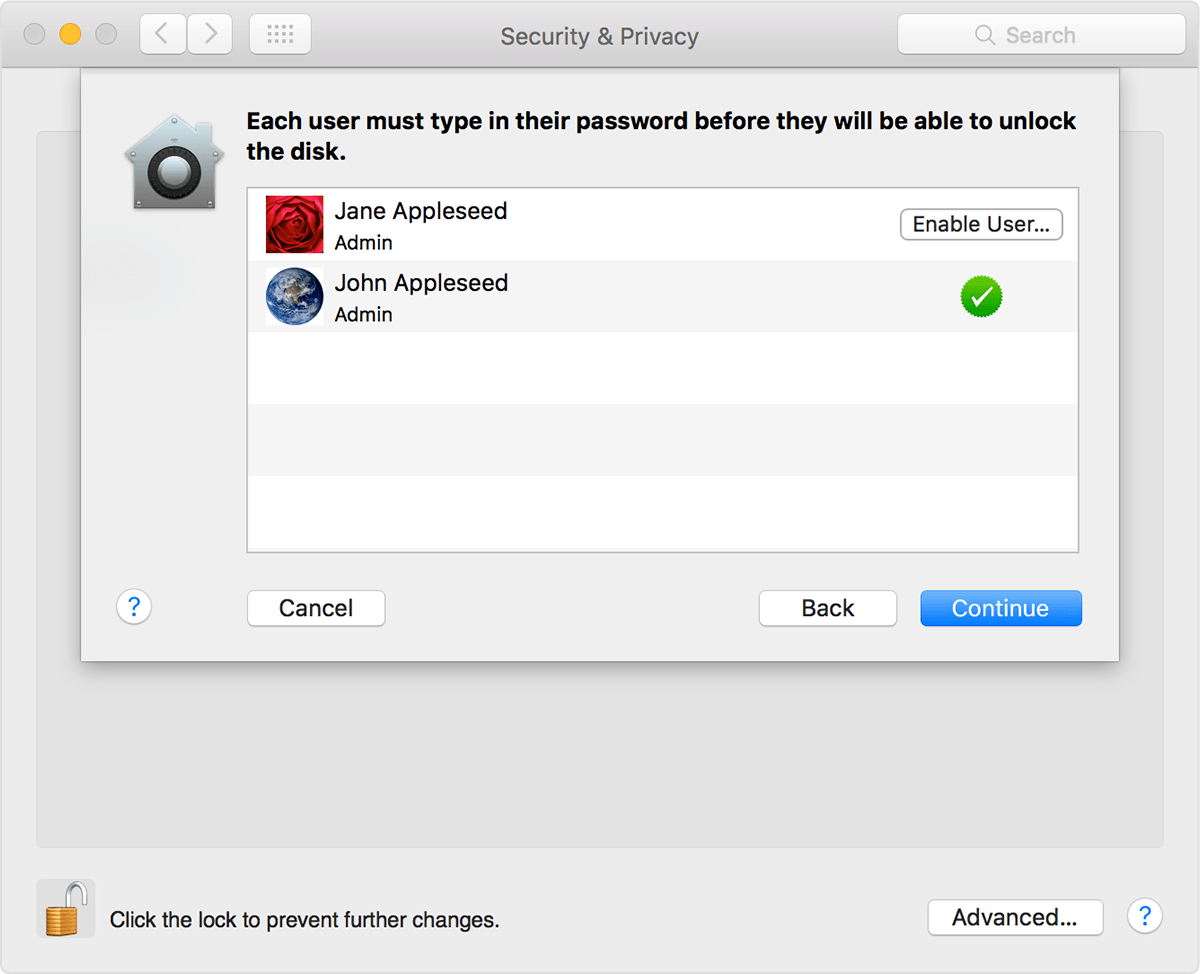
- Select Turn on FileVault. If there are multiple user accounts on your Mac, you will be asked whether you want to enable File Vault for those users. If you choose to enable File Vault for users (other than the one currently logged in), you’d be prompted for passwords.
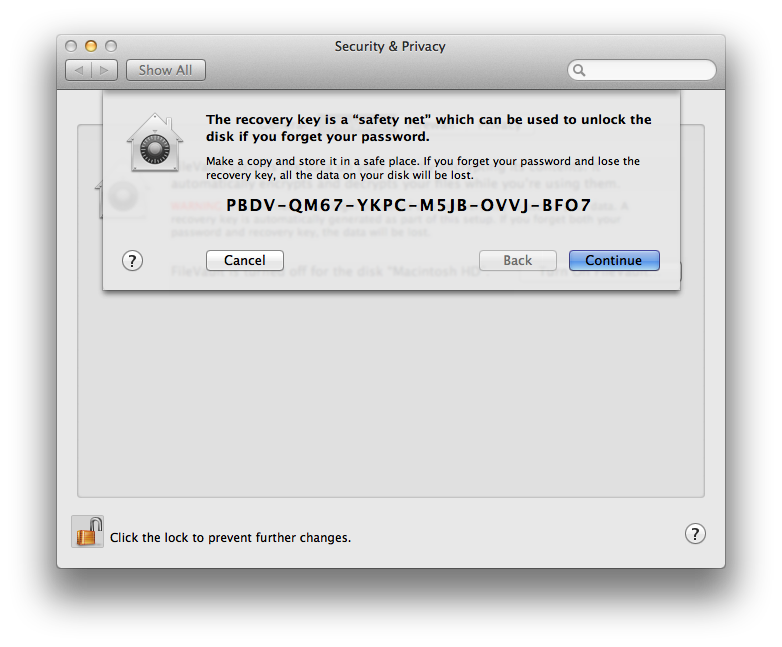
- FileVault links encryption and decryption of the disk to your login password. Additionally, it lets you create a recovery key, in case you forget your password. It is advised to create a recovery key (see below), which will be a 24 character alphanumeric key displayed to you at the time of creation. It is important that you keep this key somewhere safe (e.g. in your password manager).
Windows#
Windows’s native feature for disk encryption is called BitLocker. Please note that not all Windows versions support it, BitLocker is available on Win 10 (Edu, Pro, Ent), Win 8 (Pro, Ent), Win 7 (Ent, Ult). In order for BitLocker to work, you need to ensure that a hardware configuration, called Trusted Platform Module (TPM), is enabled on your computer’s motherboard. The TPM settings will be checked at the very beginning of BitLocker setup and you will be notified if they are not met, this is likely to happen if you’re using Win 7 platform. If you receive the below message during BitLocker setup then please contact University IT Support.
“TPM is disabled on your computer. Please enable TPM in your computer BIOS to install BitLocker”
The steps to enable BitLocker are as follows:
- Login as administrator. From the Control Panel, select BitLocker Drive Encryption and click Turn on BitLocker.
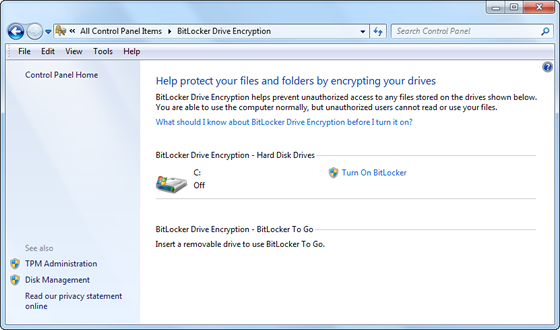
- BitLocker will check whether your computer meets the disk encryption requirements (including TPM described above). If requirements are met and TPM is already switched on, then the setup will take you BitLocker Startup Preferences Steps-7 onwards. If TPM is switched OFF, then Steps 3-6 will also need to be followed.
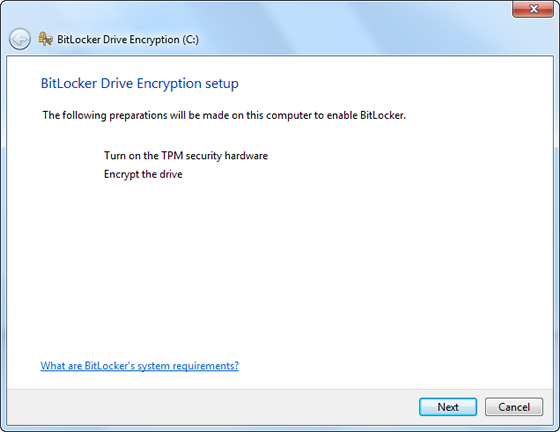
- The setup wizard will list two tasks that will be performed. First Turning on TPM and, second, encrypting the drive (see below).
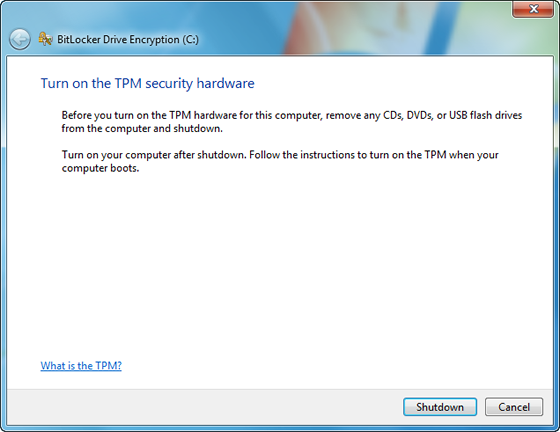
- You will be prompted to remove any CDs, DVDs, and USB flash drives from your computer. Do so, and select Shutdown as seen below.
- Once your computer is shutdown completely, turn it back on. You will be asked for confirmation of TPM setup. Confirm that you want to perform this action.
- Your computer may shut down once after the confirmation, turn it back on.
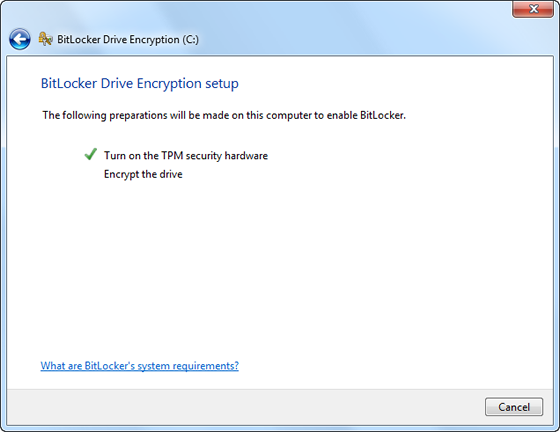
- The BitLocker Setup wizard will pop up automatically and show that first of the two setup tasks is complete (see below).
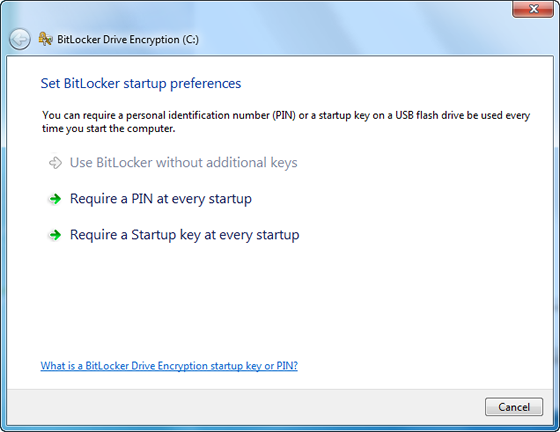
- You will be shown BitLocker startup preferences screen seen below. Select the option to Require PIN at every startup.
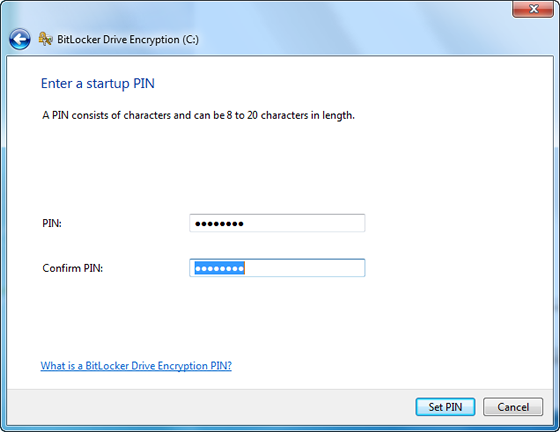
- You will be asked for a PIN, provide it. Remember that this PIN will be asked each time your computer is (re)started. This will happen before you’re asked for your login password.
- In the next step BitLocker will generate for you a 48 digit recovery key, and you will be asked for how you want to store it. You will be given the option to either print the key or save it in a USB drive. Also, it is a good idea to store this key in your password manager.
- You will need to restart your computer. Disk encryption process will then start in the background, you may continue to work during this process.
In case you want to change your start-up PIN, you can do this by going to Control Panel/BitLocker Drive Encryption and then selecting Manage BitLocker, and then from the available options select Change PIN.
For further information on full disk encryption, please follow the user guide article KB0011673 in ServiceNow.