Electric Car#
The LCSB electrical car enables to connect the different buildings of LCSB.
It is dedicated to the transport of samples, goods, materials and equipment from one LCSB building to another or from a sampling site. It can also be used to go to BTA for a maintenance, a repair or a short time experiment or meeting (max 1h). DO NOT IMMOBILIZE the car as it could be required for urgent repairs.
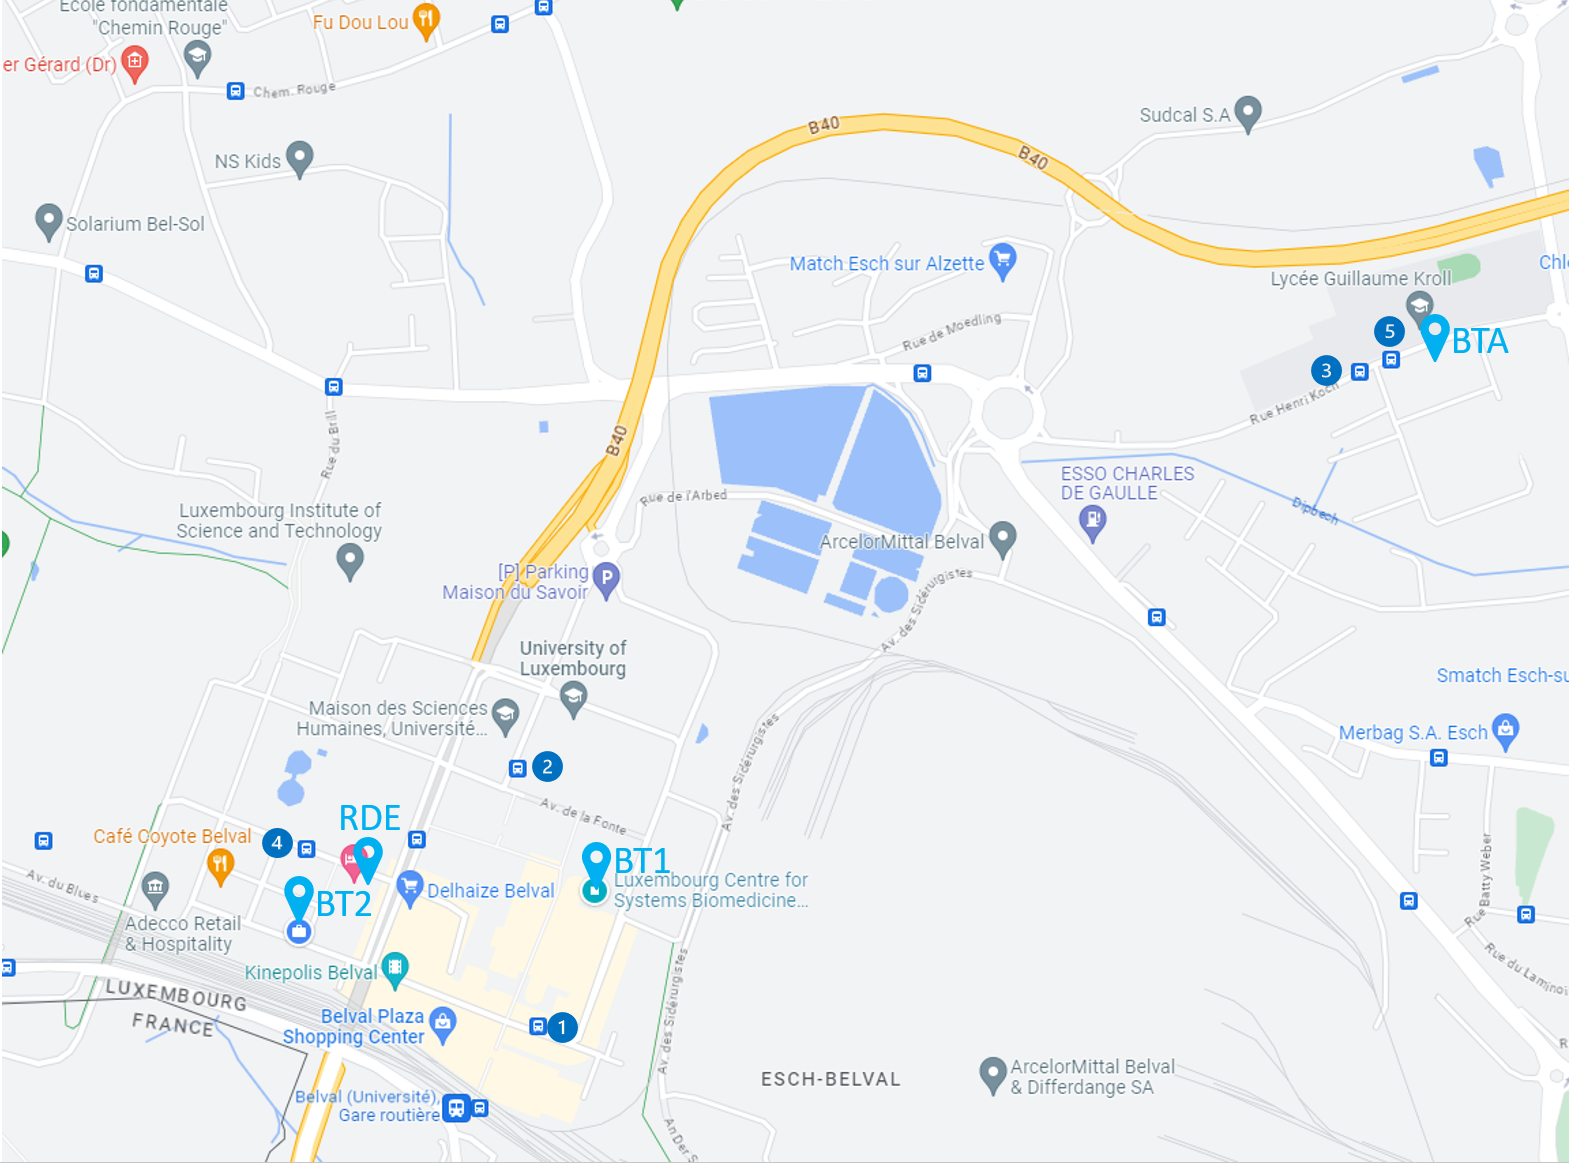
The use of the LCSB electic car is NOT for personal use. For personal transportation please consider first the public transportation system, it is fast and efficient. 2 bus connect Belval to BTA (see map of Belval)
- ligne 7 take the bus in front of the Rockhal (1) or in front of MNO (Porte des Sciences) (2) and exit in Rue Henri Koch (3).
- ligne 750 take the bus in front of MNO (Porte des Sciences) (2) or at “Porte de france” (4) and exit at “Lycée Guillaume Kroll” (5) .
Authorisation to use the electrical car and training#
Send an email to the Instrument Care Team to inform them that you would like to use the LCSB car. You will be contacted by the person in charge of giving the training and you will receive the Car convention that you will have to read and returned signed to ICT.
Charging the electric car#
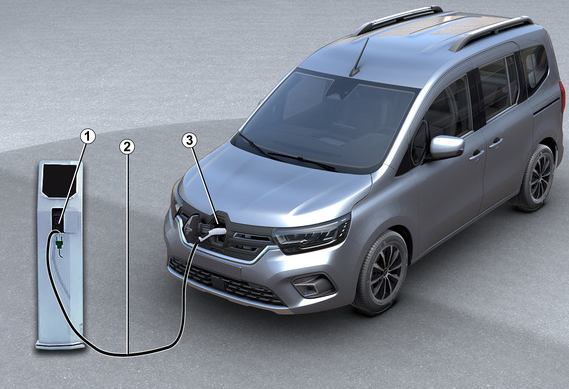
- Specific wall socket or charging station
- Charging cord
- Electric vehicle charging socket
- The Renault Kangoo E-Tech Electric and the charging station are located in -2 BT2, on parking spots 63 or 64.
- The car should be plugged in each Friday and unplugged by the first person to use it the following week
- Check the remaining driving range before and after using the vehicle.
- The car should be charged whenever the remaining range is below 50% or when required for the next planned journey.
Connect the car to the charging station#
- Check that the charging station is ON. If it is not, please use the key to switch on the station.
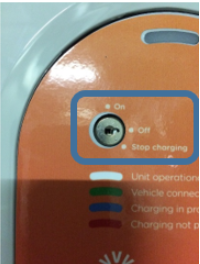
Park the car correctly in the charging space.
Put the gear selector in P.
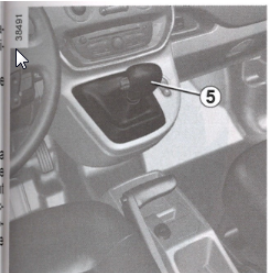
- Apply the parking brake.
- Switch the vehicle OFF.
- Take the charging cable from the trunk.
DO NOT use an extension cable, adapter, multiple socket or any other type of cable.
Make sure the charging cable is fully unrolled before starting the charge to prevent overheating.
- Unlock the vehicle.
- Open the charging flap located at the front of the vehicle. If necessary, use the charging socket unlock button on the vehicle key/card.
- Open the protective cover of the vehicle charging socket.
- Connect the charging cable to the charging station / dedicated wall socket first.
- Plug the other end of the cable into the vehicle charging socket using the cable handle.
- Make sure the connector is fully inserted.
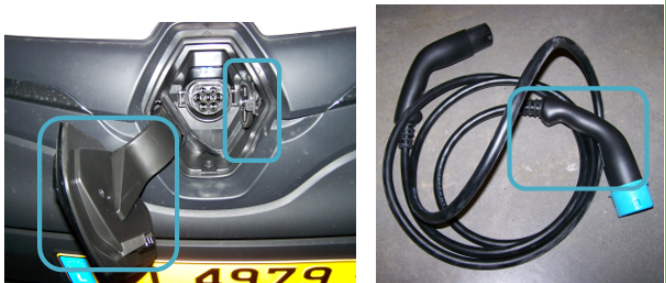
The charging cable will automatically lock to the vehicle.
The indicator next to the charging socket provides information about the charging status:
- Flashing yellow: connection is being checked.
- Flashing blue: charging is in progress.
- Continuous green: charging is complete.
- Flashing red: charging fault.
- If the indicator flashes red, disconnect the cable and try connecting it again. If the problem persists, contact the Instrument Care Team.
- Check on the dashboard that charging has started and, if displayed, check the estimated charging time.
- Lock the vehicle.
Disconnect the car from the charging station#
- Unlock the vehicle.
- Press the charging socket/cable unlock button on the vehicle key/card or use the charging socket release control on the vehicle.
- After unlocking the charging cable, you have approximately 30 seconds to disconnect it before it locks again.
- Hold the charging cable by its handle and unplug it from the vehicle.
- The cable may be warm after charging. Always handle it using the connector handle.
- Close the protective cover of the charging socket.
- Close the vehicle charging flap and make sure it is properly locked.
- Disconnect the cable from the charging station / wall socket.
- Store the charging cable correctly in the trunk.
- Lock the vehicle.
- If applicable, close/lock the charging station.