Cryostorage: utilization#
The BioStor III Cryo is a cryostorage system that offers sample automation, cold chain management and security for the users. It is an automated box-picking store which automates the selected rack extraction and presents the requested cryobox to the user. It also minimizes the other samples for the same rack and from the freezer from reaching a temperature above 135°C. When a rack is pulled out from the tank, the user has to retrieve the sample within two minutes. After this time, the system will put the rack back into the freezer in order to maintain the integrity of the samples.
If you want to use the cryostorage for the first time, please follow the e-learning and send a ticket to the support team for the practical training.
If you notice any issue with the cryostorage, please contact the support team immediately. If the issue is not critical, please send a ticket.
Safety rules#


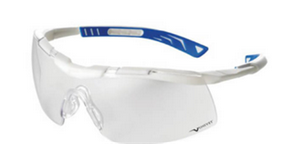
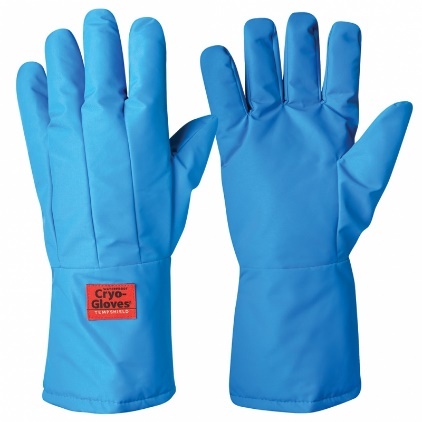
Please, wear your lab coat, safety glasses and cryo gloves.

Description#
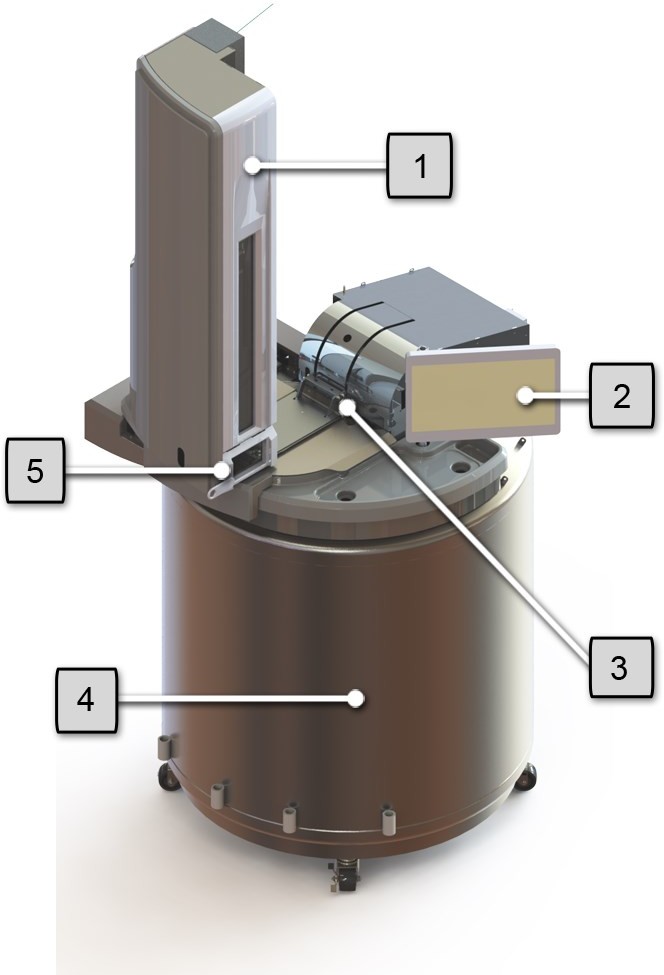
| Number | Description |
|---|---|
| 1 | Rack Puller and Sleeve |
| 2 | Interactive Monitor |
| 3 | Lid Lifter and turntable Assembly |
| 4 | Chart Freezer |
| 5 | Access Door Module |
Emergency procedure#
If a rack get stuck in the tower, a manual intervention is mandatory to avoid any damage on the samples from this rack. This action must be done in less than 2min to avoid the temperature to reach -135°C.
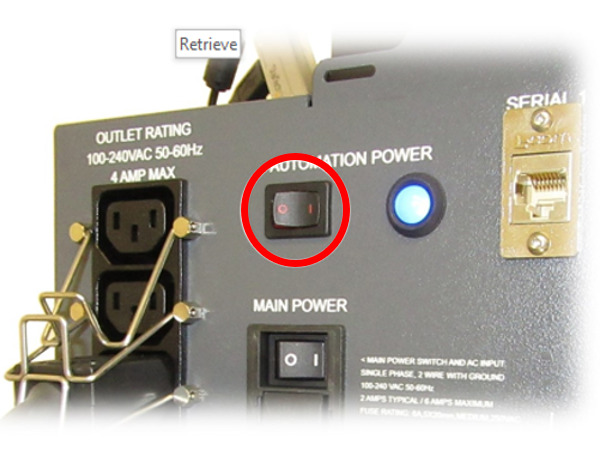
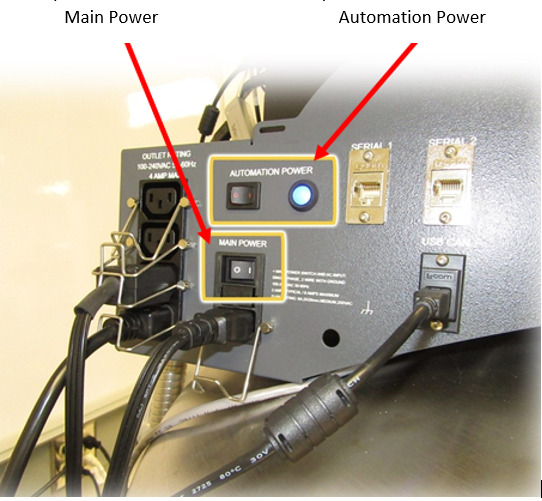
- Switch off the automation power on the computer stand.
- Open the tower door. The door is secured by magnetic latches.
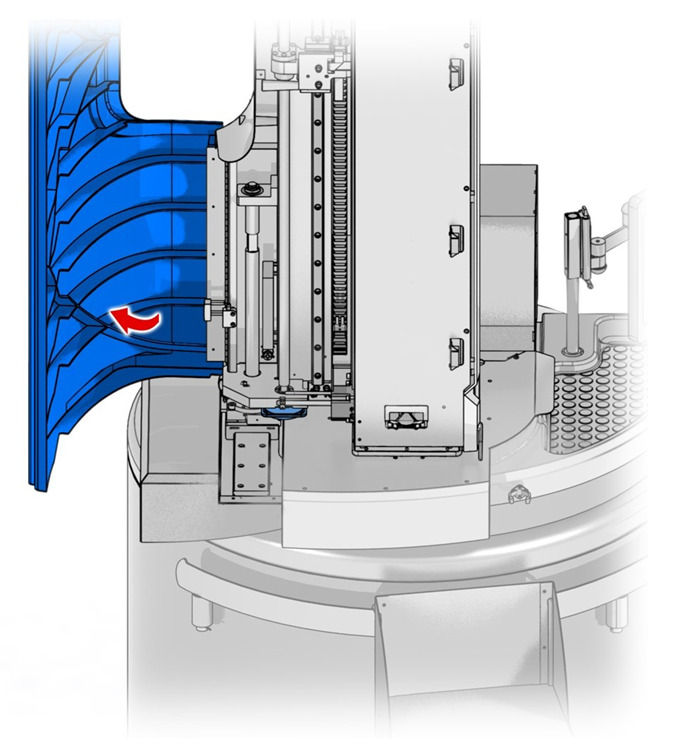
- If a rack is stuck in the tower, push the brake release down so the ball screw can be rotated.
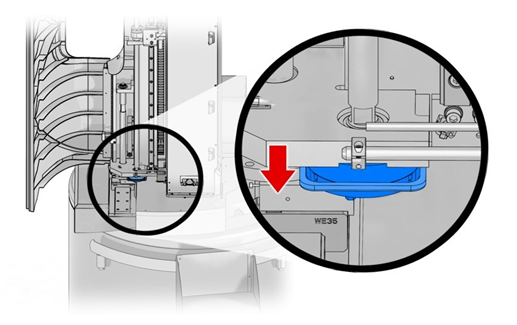
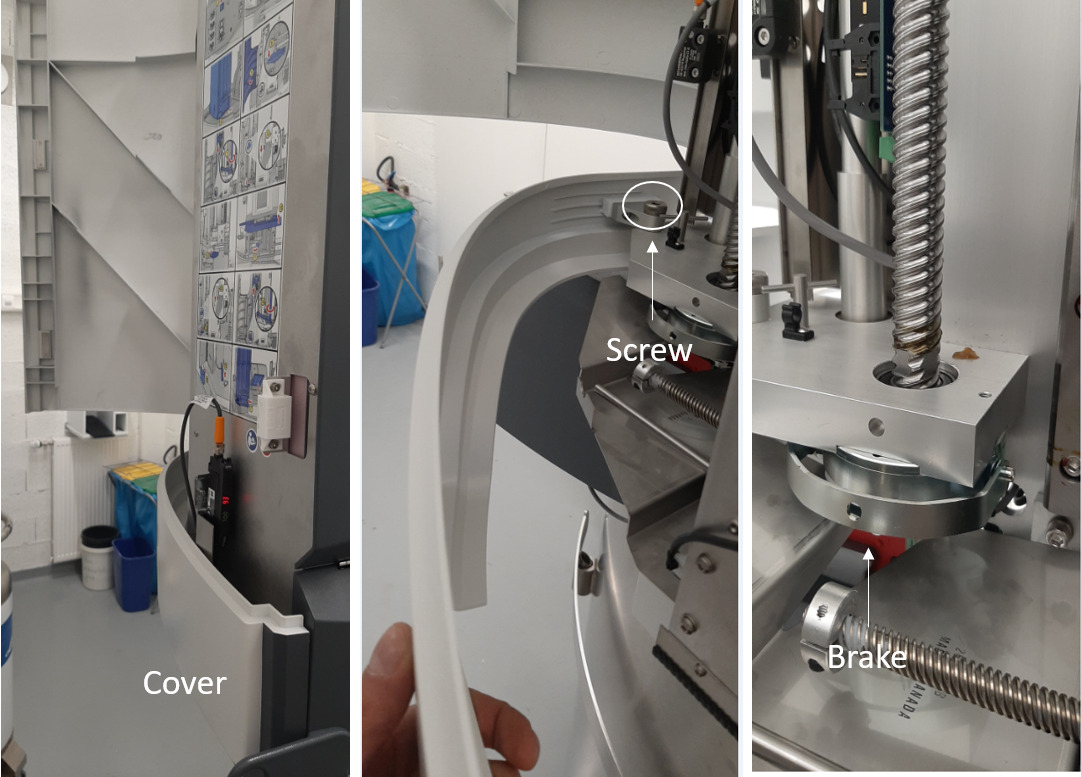
The cover must be removed to have access to the brake. To do so, a screw must be removed.
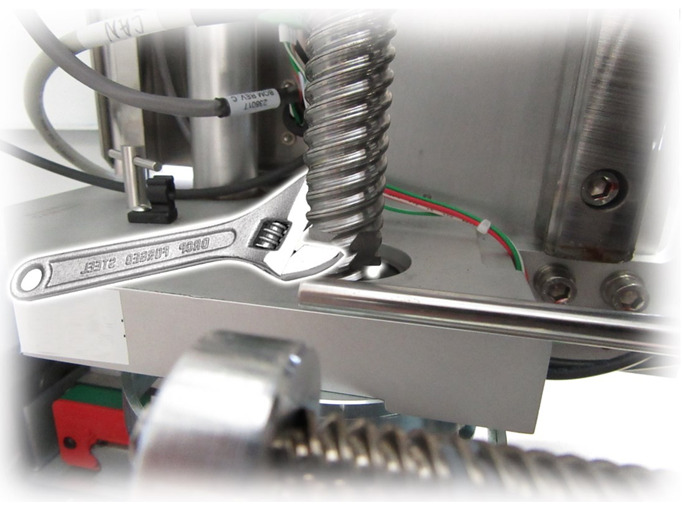
- Use a wrench on the flat part of the ball screw to lower the hand brake lever until you can reach the box. Hold the brake release while you pull the manual lever down.
- Pull the manual brake lever down once you are able to reach the box to lower the rack back into the freezer. Hold the brake release while you pull the manual brake lever down.
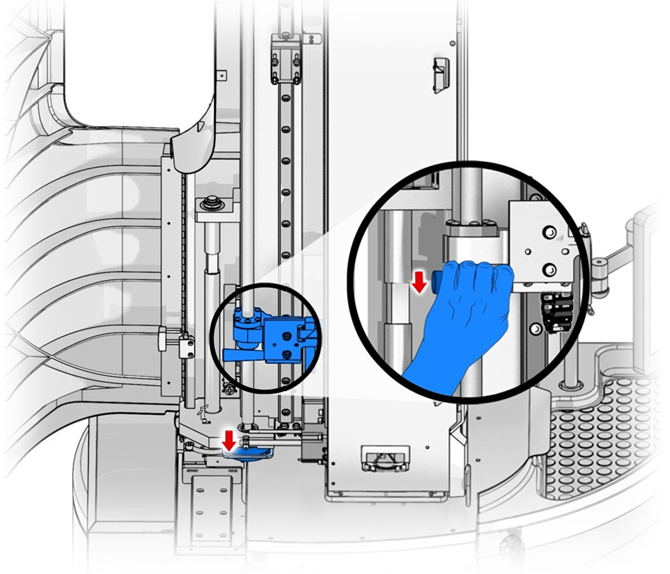
- Release the brake release

- If a rack is stuck in the tower, release the rack from the gripper back into the dewar.
Now, the rack is safe. Please, do not forget to let the instrument
care team aware about this issue.
Please, create a ticket explaining the issue.
Operation#
Power On Sequence#
- Turn on the main power switch and the automation power switch.
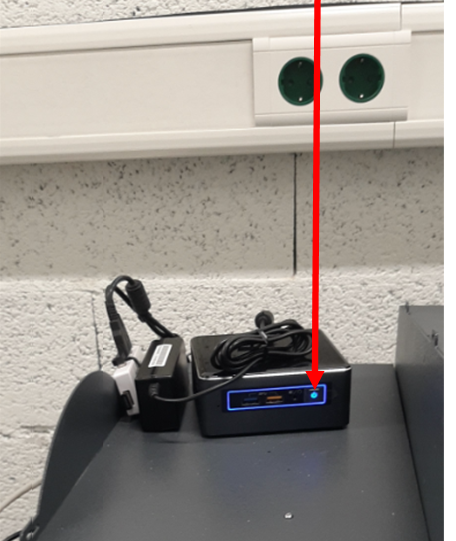
- Turn on the computer power.
- Sign in to the BioStore III. A login and a password will be provided to each user after completing the practical and theoretical trainings.
- Click on Go Online
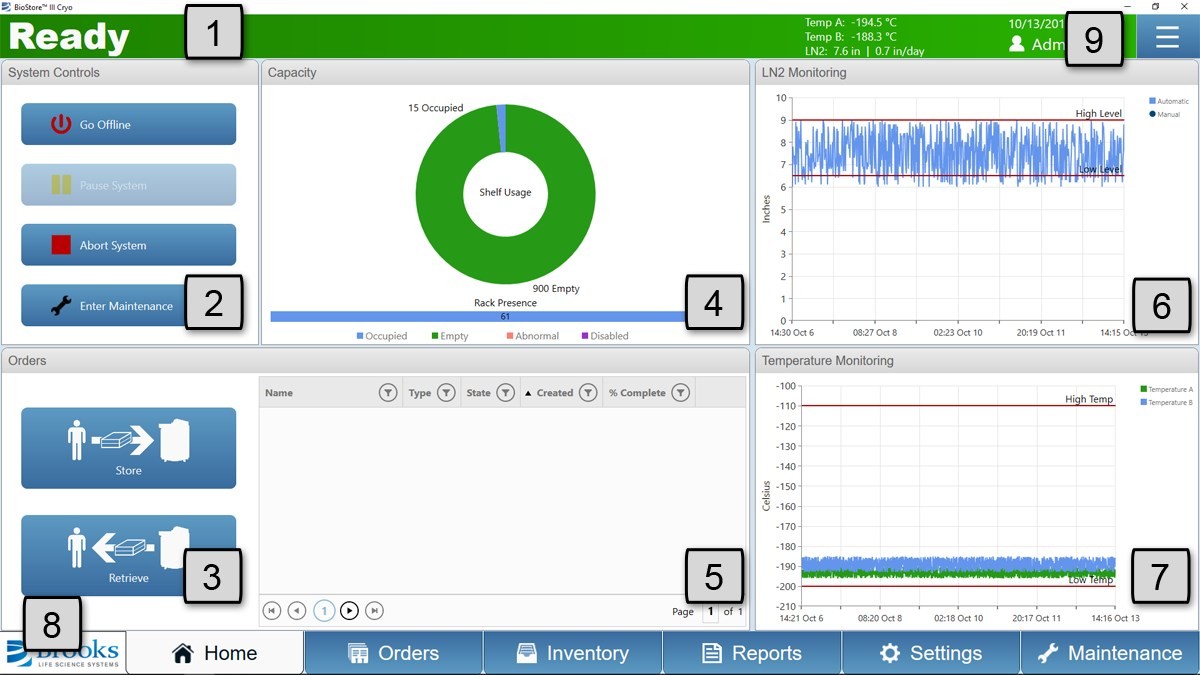
Software Dashboard#
| Number | Description |
|---|---|
| 1 | System States |
| 2 | System Controls |
| 3 | Orders |
| 4 | Capacity |
| 5 | Quick View of the Order Queue |
| 6 | LN2 Monitoring |
| 7 | Temperature Monitoring |
| 8 | Home Page Navigation Tabs |
| 9 | Drop-down UI |
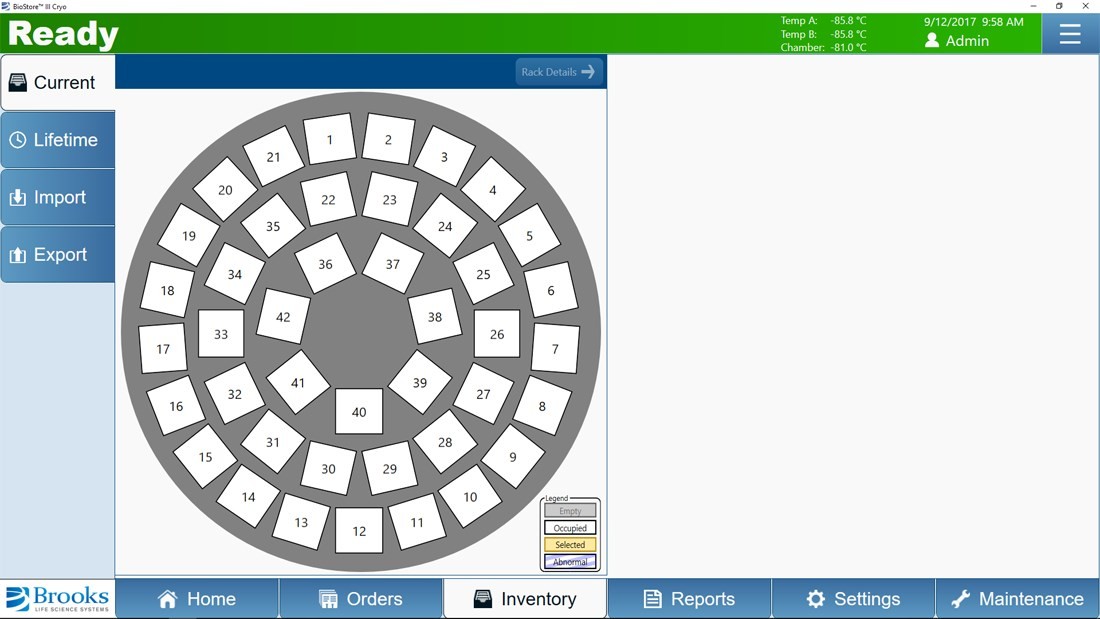
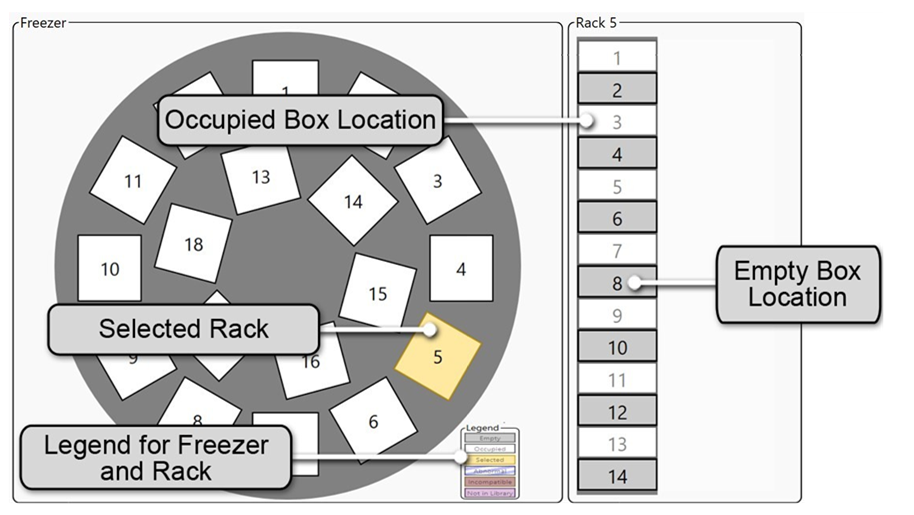
Freezer Layouts#
How to store a sample#
- Make sure the system is initialized.

- Click on Orders

- Click on Store
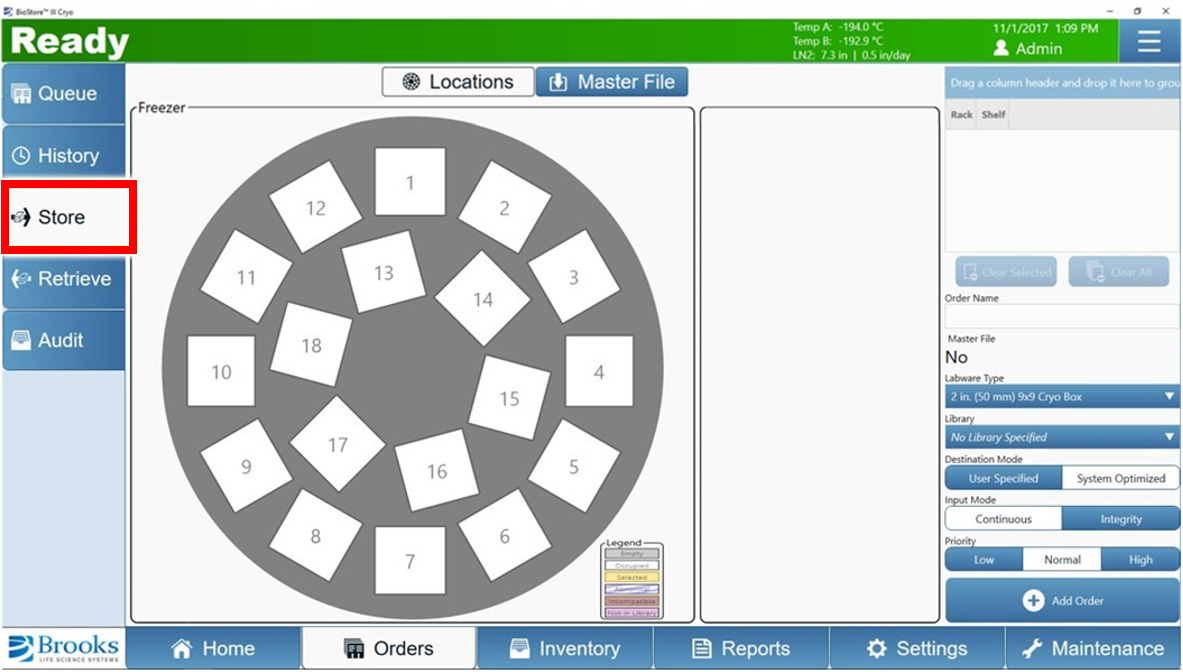
- Select the rack number in the freezer pane and select the shelf location in the rack pane.
- Indicate your name in the Order Name and select the different parameters. Click on Add Order.
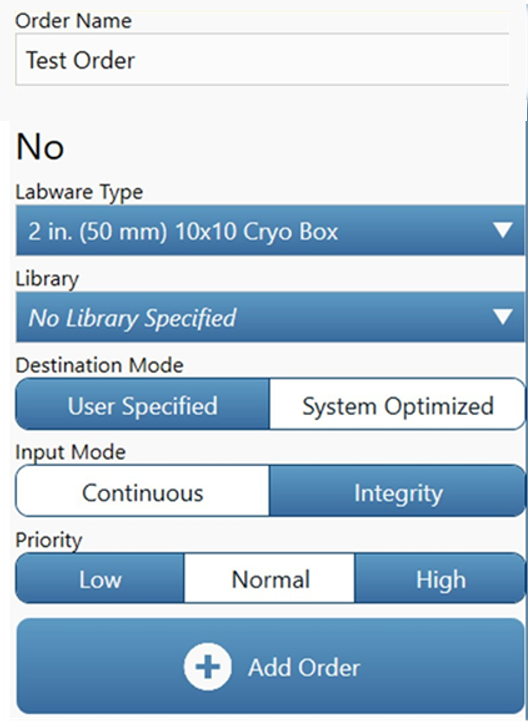
Note: the selected choice is the one in white.
Labware Type Only 2 models are available:
- In. (53 mm) 9x9 Cryo Box
- In. (50 mm) 10x10 Cryo Box
Library
Select a specific library to ensure your sample is stored in a partition assigned to the user group. Each user receives a dedicated partition related to his/her group.
Destination Mode
User Specified: the operator must select an empty location.
System optimized: the software will present the next empty box to the operator.
Input Mode
Continuous:the rack will not be returned to the freezer during data entry or confirmation.
Integrity: return the rack to the freezer during data entry or confirmation.
Priority
We recommend to always use the Normal priority mode.
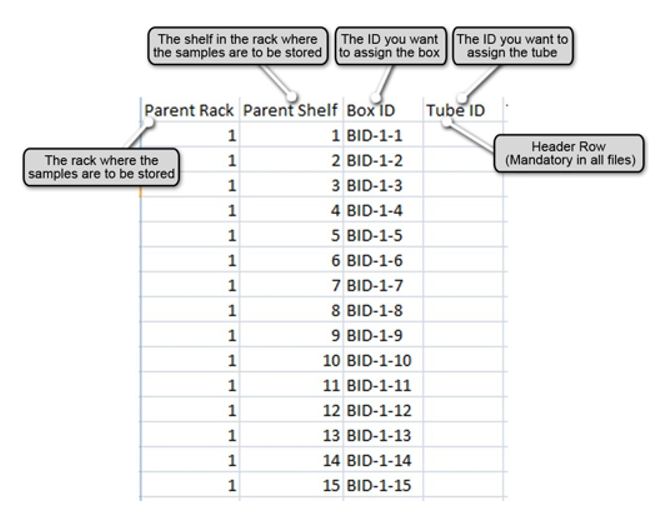
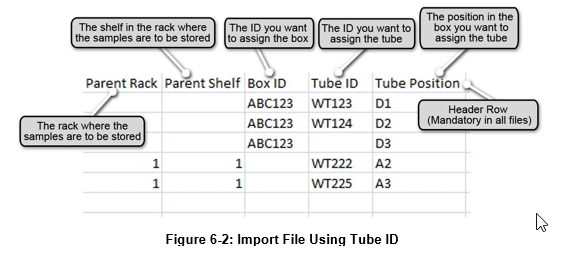
How to store a sample using a master file#
A store order can be executed using a master file created by the user. The master file must have a .csv extension in order to be imported. If you want to use a master for the first time, please contact the Support Team.
Format for Boxes
Format for Tubes
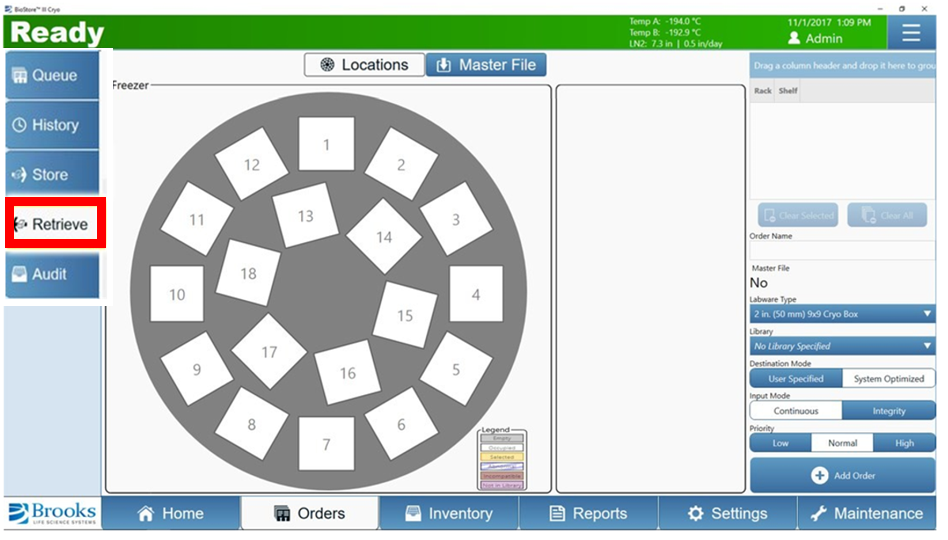
How to retrieve a sample#
- Make sure the system is initialized.
- Click on Orders
- Click on Retrieve
Retrieve a sample by its location#
- Click on By Location
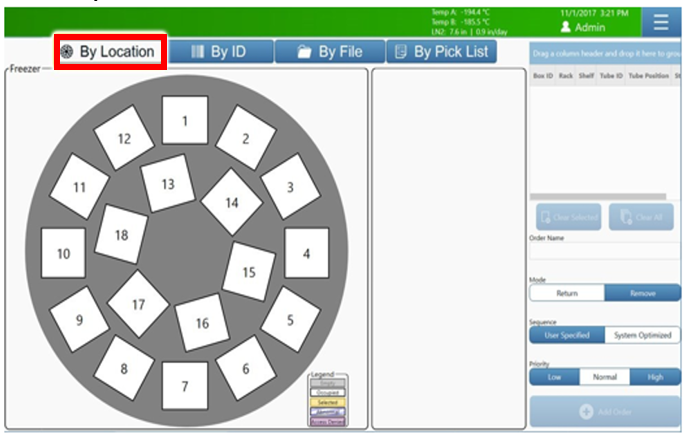
- Select the rack number in the freezer pane and select the box location in the rack pane. This will add the labware to the order. Add as many boxes as necessary to the order. The requested items will be displayed on the right side of the screen.
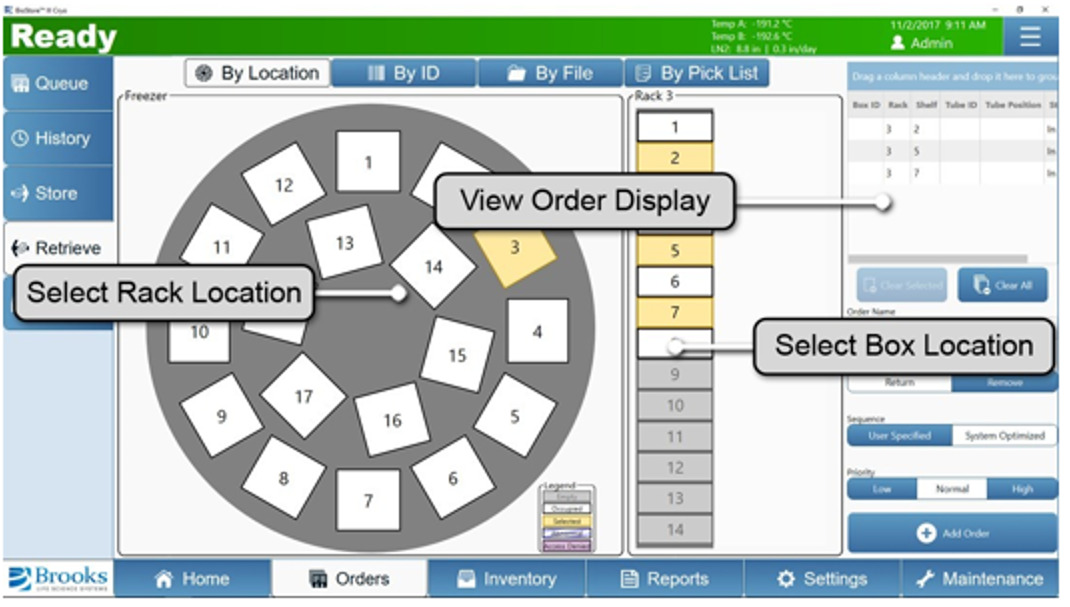
- Optional: indicate an Order Name. If not, it will be generated automatically. Select the different parameters and click on Add Order. A pop-up “order Added” will appear and the order is now queued for execution.
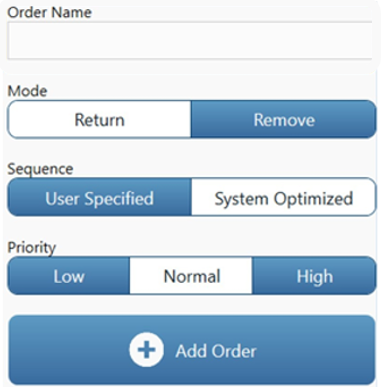
Mode
Return: the box will be returned to the same location
Remove: the box will not be returned
Sequence
No difference between User Specified and System Optimized.
Priority
We recommend to always use the Normal priority mode
Retrieve a sample by its ID#
- Click on By ID
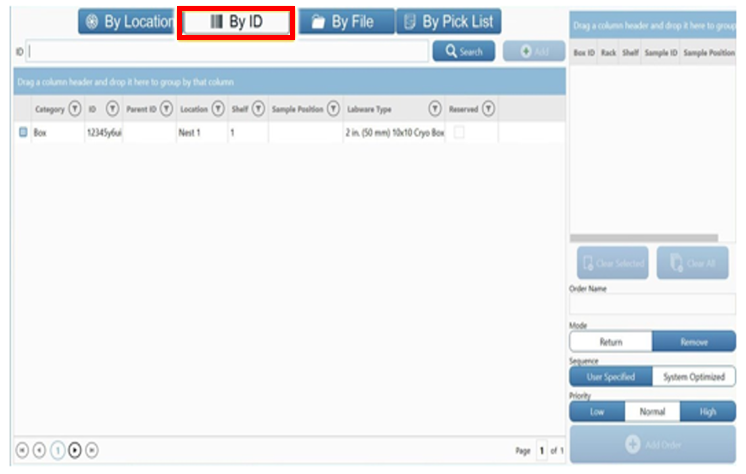
- Enter the ID of the sample you are looking for.

- Click on Add to had the box to the order queue

- Confirm that all boxes selected for the order were added to the order queue.
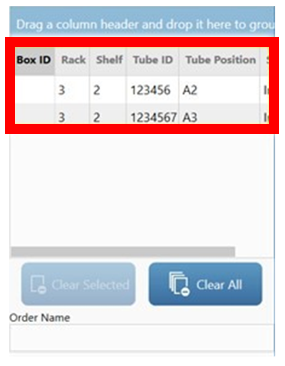
- Optional: indicate an Order Name. If not, it will be generated automatically. Select the different parameters and click on Add Order. A pop-up “order Added” will appear and the order is now queued for execution.
Mode
Return: the box will be returned to the same location
Remove: the box will not be returned
Sequence
No difference between User Specified and System Optimized.
Priority
We recommend to always use the Normal priority mode.