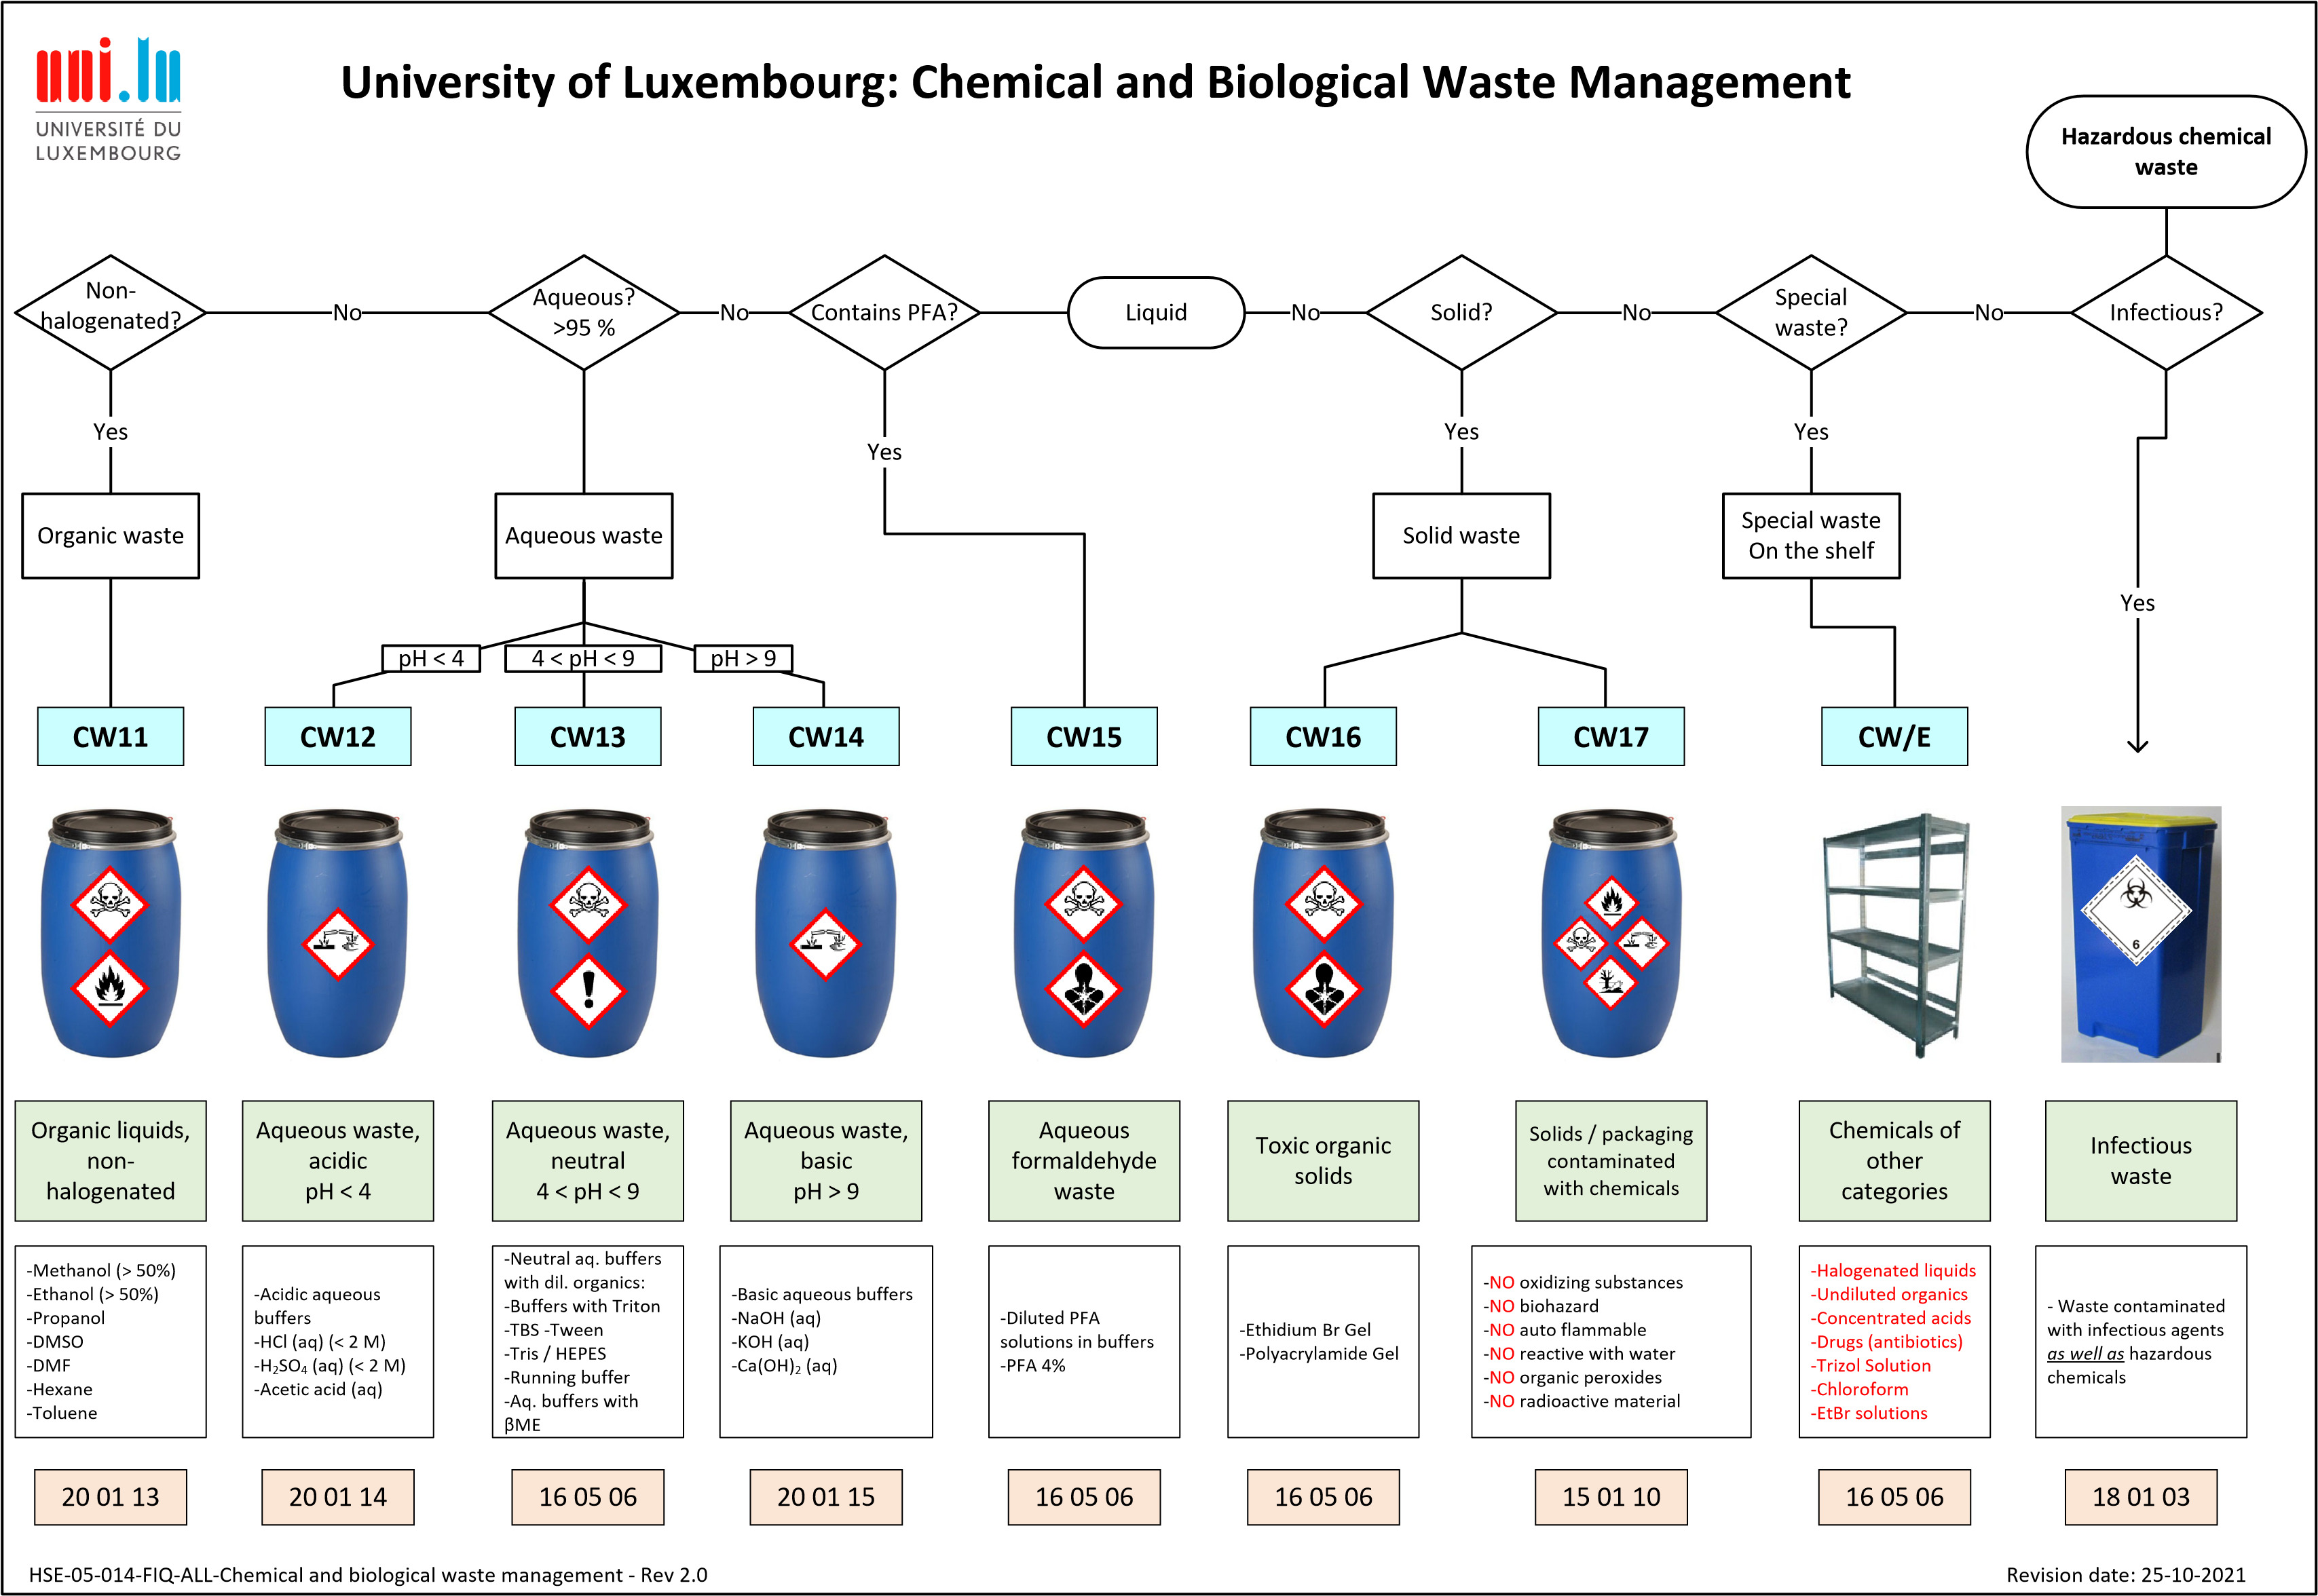
- Autoclaves: utilization
- Safety rules
- Common issue
- How to autoclave solids/instruments
- How to autoclave liquids
- How to autoclave wastes
- How to check sterilization efficiency
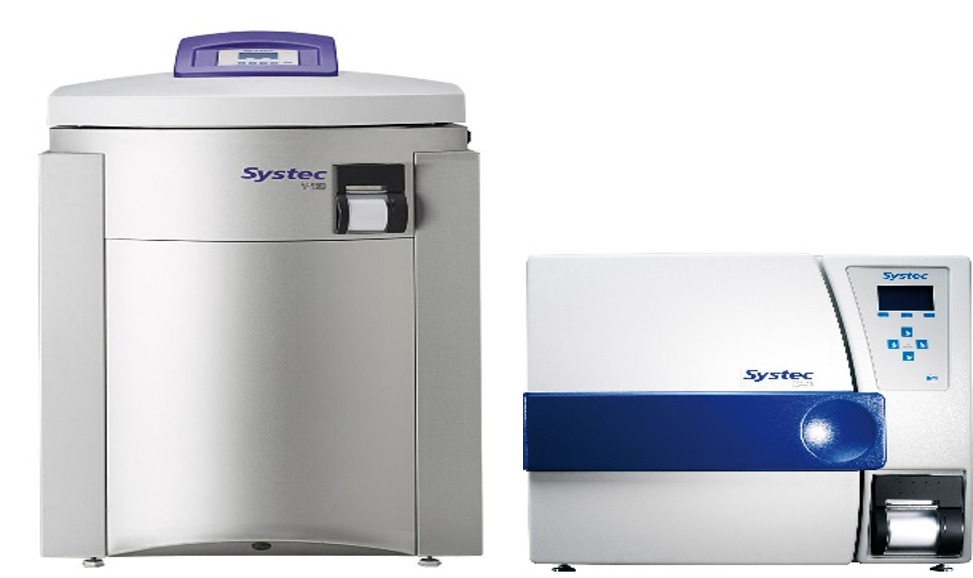
- How to run a cycle in Systec autoclaves VX-150 and DX-65
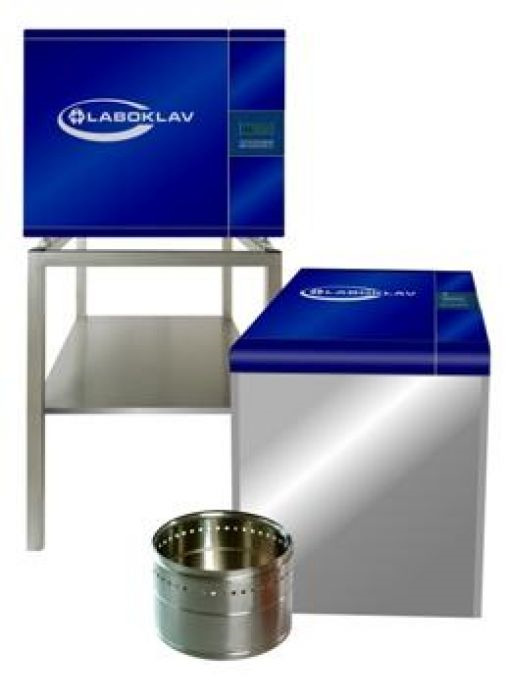
- How to run a cycle in SHP Laboklav autoclaves
- Routine maintenance of autoclaves
- How to use Certoclav autoclave (BT1, LCSB00509)
Autoclaves: utilization#
Autoclaves are used to perform sterilization of liquids and instruments and decontamination of liquids, solid and waste that are contaminated with biohazard materials. For more general information about autoclaving systems, feel free to watch this video published by the World Health Organization (WHO).
Before using the autoclaves, check that the appliance is fine. Pay special attention to the integrity of the gasket. If you are aware of any damage or if an autoclave displays an error message, send a ticket to the Instrument Care team. At the end of the description, include “Please notify:” and add the names of the instrument responsible person as well as the responsible backup person.
Safety rules#
Before using the autoclave for the first time, read the utilization instructions below
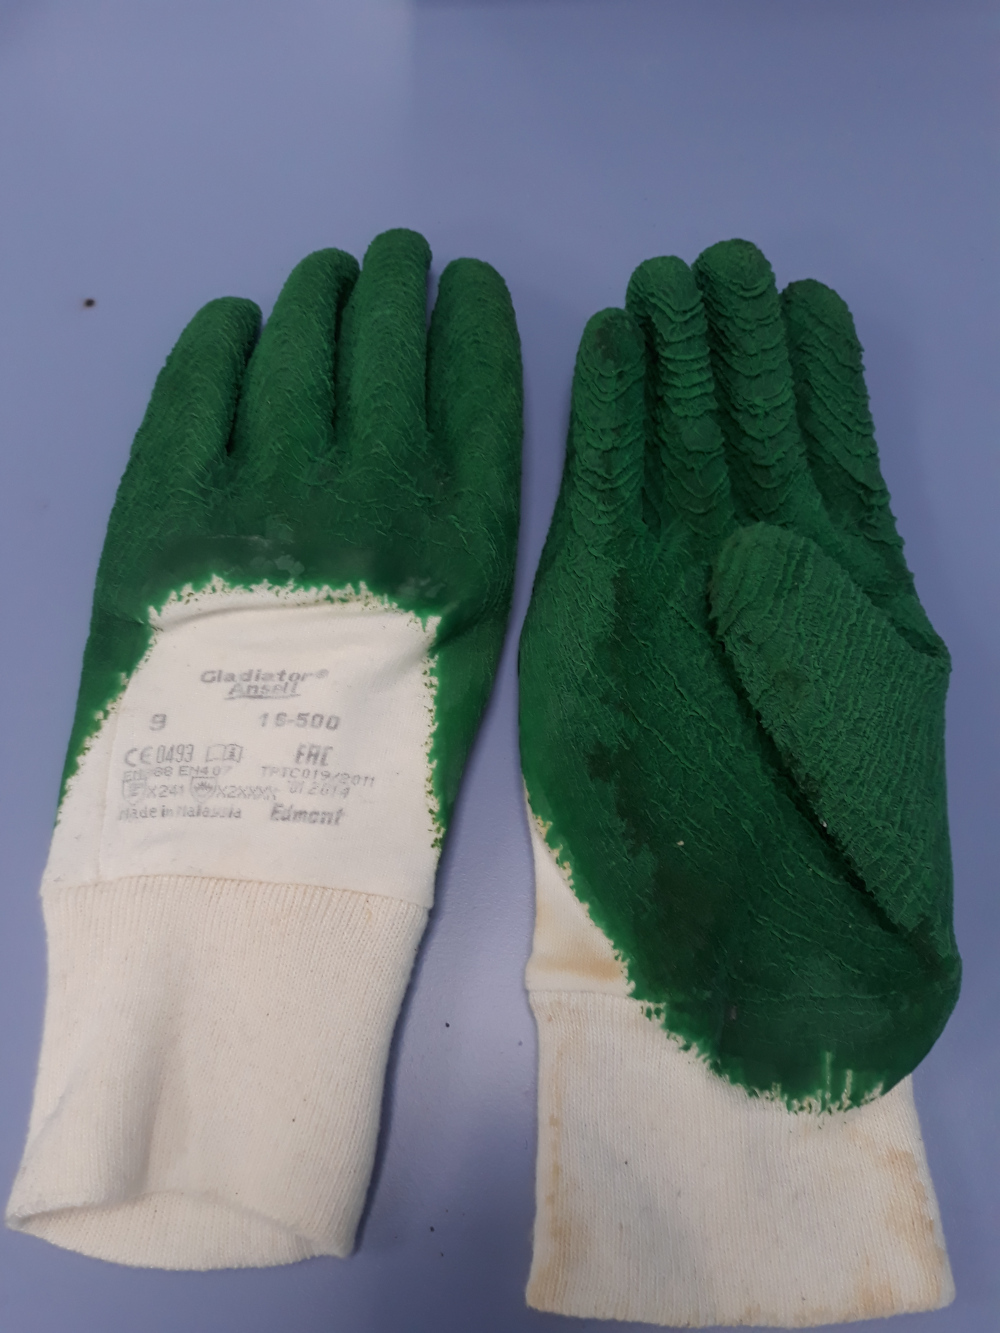
Always wear protective personal equipment: lab coat, thermo-resistant gloves and safety glasses
Risks associated with the utilization of the autoclave include:
- Crushing or amputation of fingers or arm: if closing of the door is no longer damped by spring or hydraulics
- Burns after sterilization: hot clouds of steam can escape and lead to burns and the surfaces inside the container can be hot after a sterilization cycle
- Heavy loads: fully-loaded baskets can be too heavy to lift as such, therefore the basket should be partially unloaded before lifting the basket
Each use of an autoclave should be recorded in the corresponding log book with the date, the cycle number and the initials of the operator
To avoid release of toxic smells in the lab: NEVER AUTOCLAVE TOXIC OR VOLATILE CHEMICALS! Refer to the University Chemical and Biological Waste Concept to use the correct bin.
Common issue#
Flasks overfilled with agar can lead to over boiling and spill of agar within the autoclave. Would this happen please remove all items from the autoclave and place a sign “Do not use this instrument” on the instrument. Send a ticket to the Instrument Care team. At the end of the description, include “Please notify:” and add the names of the instrument responsible person as well as the responsible backup person. Clean all inner surfaces of the chamber. Wait for the reply from the Instrument care team to run a program at 134°C (empty chamber) to remove the agar from the hoses and pipes:
- Systec: program 12
- Laboklav: program P6
How to autoclave solids/instruments#
To remember: steam must penetrate the load. Tolerance to temperature is linked to humidity. As an example the temperature of a sauna, which is dry heat is between 70 and 100°C. For hammam, where there is steam the temperature is between 40 and 50°C. Similar to humans, some bugs are able to survive to high dry heat. Therefore, you must allow steam to reach your load to ensure the sterilisation process.
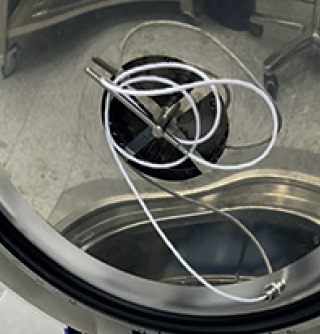
- Place the flexible temperature sensor in the holder provided for it on the lid
Make sure to wrap the sensor so that the wire is coiled around the holder. If it is not, this could result in damage of the sensor or if the wire interferes with the closing of the lid, to a steam exhaust of the chamber during the run.
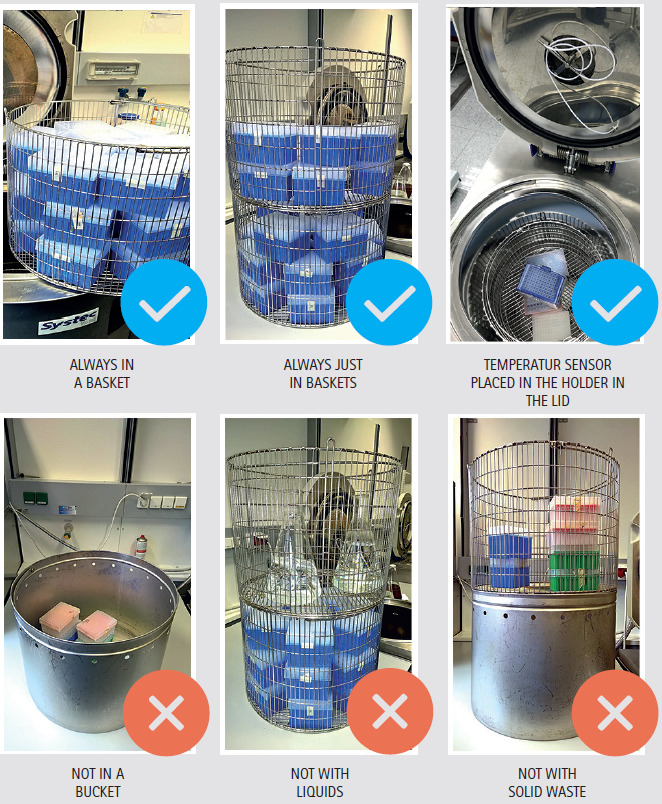
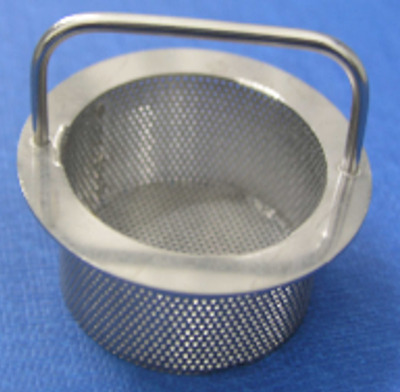
- Load the autoclave with the products to be sterilized. Put the products in a wire-mesh basket . Do not use the bucket
- If the instruments are autoclaved in containers, make sure that the lid is loose
 Do not autoclave liquids with the solids cycle, there is a risk of explosion due to building pressure inside the liquid container
 The door can be opened when the atmospheric pressure has been reached; therefore, the temperature of the appliance and the sterilized products can still be 100°C or more when the cycle is finished
- Run a sterilization cycle (see How to run a cycle in Systec autoclaves VX-150 and DX-65 or How to run a cycle in Laboklav autoclaves)
- When the sterilization cycle is complete and the specific unloading temperature and pressure have been reached, the message “Cycle ended” or “Opening door” appears on the display
- Press the “Open” display key and lift the door using the grip handles until it reaches the vertical stop
- The autoclave chamber can now be unloaded. For instruments, carefully take them out and close the containers if applicable. Be careful, items might still be hot. You can use heat resistant gloves as PPE
- If the autoclave is not further used for several hours, close the door and switch it OFF
How to autoclave liquids#
- Place the liquids to be autoclaved in a wire-mesh basket
If you fear an over boiling or a leakage of one of your bottles, place the wire-mesh basket on top of the bucket. All liquids will accumulate in the bucket and will not influence your autoclaving process.
⚠️Do not use the basket only perforated on the upper third: the accumulation of condensation in the basket can lead to a lack of water and to the termination of the process or to a significant loss of volume
⚠️Always use temperature-resistant containers that can withstand temperatures > 121°C
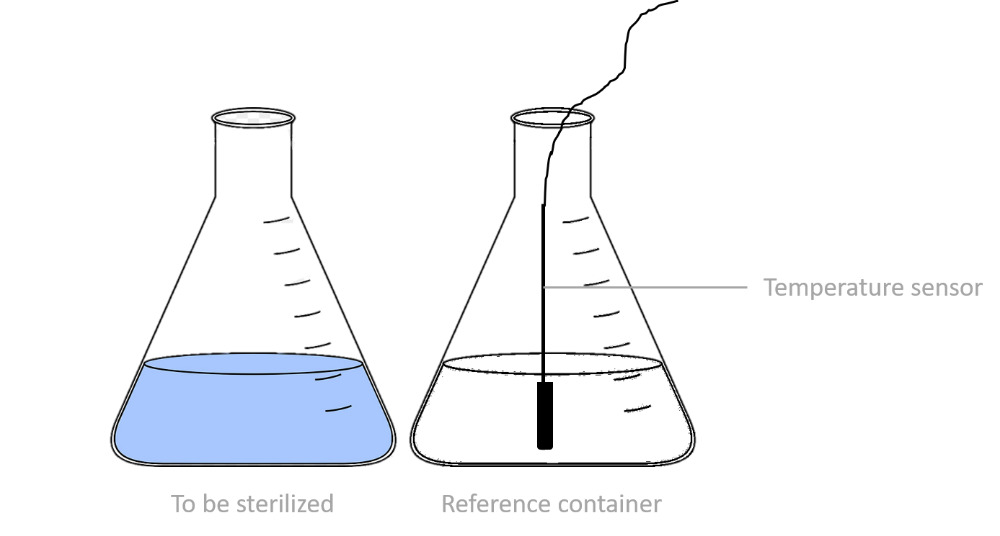
- Place the flexible temperature sensor in a reference container which has the same size and same fill volume as the largest container that contains the liquid to be sterilized. This is necessary to
- Ensure that the wanted sterilization temperature is reached inside the liquid
- Ensure a safe cooling temperature
- The liquid can either be autoclaved with or without cap
- Without: 5% of the volume can be lost due to boiling. Moreover, open containers should not be filled more than 75%
- With: if the container is autoclaved with a lid, do not tightly close it. Simply slightly close the lid
Due to the pressure building in the container during the sterilization, a tightly closed container may be at risk for explosion
Never stack bottles on top of each other
Avoid using plastic bottles as containers, the heating time is longer
Avoid autoclaving bottles with high volume difference (i.e.: 50 mL and 1 L) to avoid liquid loss
- Run a sterilization cycle (see How to run a cycle in Systec autoclaves VX-150 and DX-65 or How to run a cycle in Laboklav autoclaves)
- When the sterilization cycle is complete and the specific unloading temperature and pressure have been reached, the message “Cycle ended” or “Opening door” appears on the display
- Press the “Open” display key and lift the door using the grip handles until it reaches the vertical stop
- The autoclave chamber can now be unloaded. Be careful, items might still be hot. You can use heat resistant gloves as PPE
- Close the lids when taking the containers out, liquid waste can now be discarded in the sink
- If the autoclave is not further used for several hours, close the door and switch it OFF
How to autoclave wastes#
The sorting of waste in our laboratories is explained in the Waste Management training (part 7 of the newcomer training), a mandatory e-learning for newcomers. This training describes each category of waste and how to treat them.
In the category of infectious waste, non contaminated by hazardous chemicals and / or toxins, solid waste can be autoclaved as well as some cell culture liquids (check the waste How-to Card for more information).
After the autoclaving cycle of these liquids (see How to autoclave liquids), they can be discarded into the sink.
For solid waste that can be autoclaved:
- Always autoclave the waste bags in biohazard waste bins to prevent accumulation of dirt in the autoclave that could damage the instrument
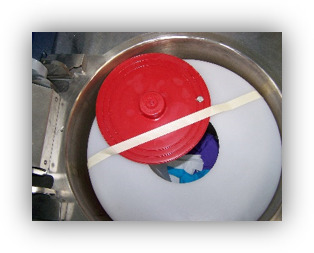
- Do not close the autoclave bag, and open the red part of the lid of the biohazard bin for the autoclaving. Fix it open with autoclave tape
- Place the flexible temperature sensor in the holder provided for it on the lid
⚠️Only laboratory waste in solid form and with only a small proportion of liquid may be sterilized in the waste bags
- Run a sterilization cycle (see How to run a cycle in Systec autoclaves VX-150 and DX-65 or How to run a cycle in Laboklav autoclaves)
- When the sterilization cycle is complete and the specific unloading temperature and pressure have been reached, the message “Cycle ended” or “Opening door” appears on the display
- Press the “Open” display key and lift the door using the grip handles until it reaches the vertical stop
- The autoclave chamber can now be unloaded. Be careful, items might still be hot. You can use heat resistant gloves as PPE
- Close the waste bag, transfer it to household trash bag and store them in the dedicated boxes. Do not place more than one autoclave bag into a trash bag, otherwise the trash bag is too heavy for the cleaning staff
- If the autoclave is not further used for several hours, close the door and switch it OFF
How to check sterilization efficiency#
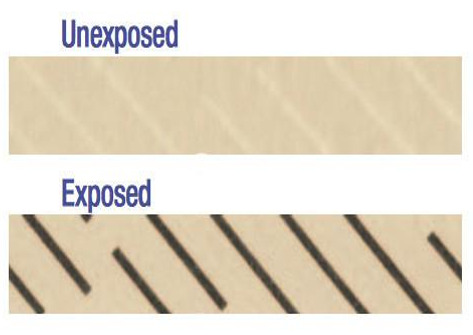
For each cycle, you should use autoclave tape on the items awaiting autoclaving. The exposure to steam during minimum 30 sec will induce a color change of the tape from white to dark brown stripes. This indicator allows distinguishing units that have been exposed to the sterilization cycle from those not unexposed. It ensures that the wastes are not evacuated from the lab before having undergone the decontamination cycle.
Once a week, a chemical indicator has to be placed in the autoclave with the load to ensure proper functioning (Comply Thermalog, 3M, 2134MM)
- The indicator is placed in the first load of the week
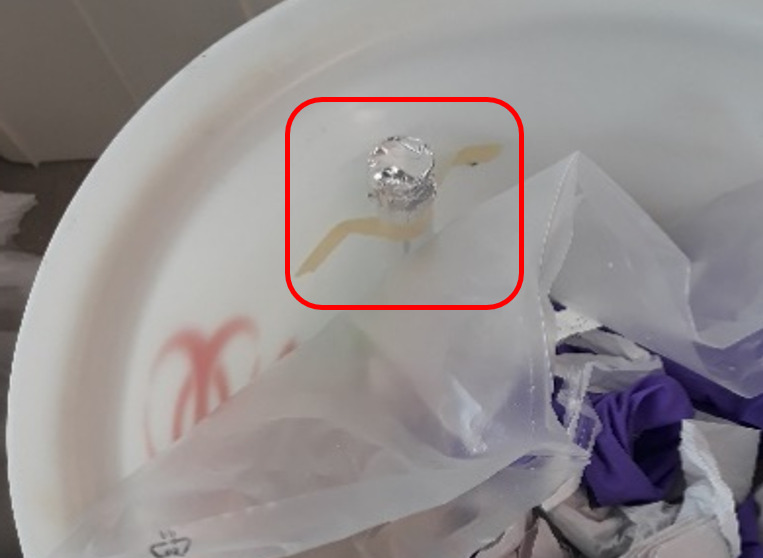
- For waste load, place the strip in a 50 mL Falcon tube, closed with aluminum foil without lid (it melts during the run) and tape it to the inside of the bin
- Important: The aluminum foil should not be crimped too tightly. It must allow steam to penetrate inside the tube to ensure proper activation of the indicator
- For any other load, place the indicator in a beaker and close it with aluminum foil
- Results:
- Good: the blue reached the “safe” zone
- Bad: the blue did not reach the “safe” zone

- Indicate the date on the strip and staple it to the log book
- If the blue band did not reach the “Safe” zone, please send a ticket to the Instrument Care team with LCSB number and the error message
- If the sterilization cycle is unsuccessful, the load must be re-autoclaved as soon as possible (with a use of a new chemical indicator). If the cycle remains unsuccessful after repetition (or if it is not possible to repeat the sterilization cycle immediately), the waste must be stored separately from deactivated waste to ensure that it is not inadvertently evacuated with regular domestic waste.
How to run a cycle in Systec autoclaves VX-150 and DX-65#
- Fill the autoclave depending on the nature of the product (described previously)
- Close the door by pressing down with both hands until the seal comes in contact with the chamber and a vacuum is generated. You hear a sound signal and the device displays “Ready” as the door is successfully locked
- Press on “Menu” key on the display, go to “Select cycle” and press “Set”
- Select the right program cycle using the arrows and press “Set”

- Press “Start” and fill the log book with the date, the cycle number and your initials
- In case of an incomplete run, please send a ticket to the Instrument Care team with LCSB number and the error message. In such case, the lid can’t be open due to temperature security and the Instrument Care team must get involved. The uncompleted cycle should be repeated after fixing of the issue with the autoclave and or by using another autoclave.
How to run a cycle in SHP Laboklav autoclaves#
- Fill the autoclave depending on the nature of the product (described previously)
- Press the door down until the seal comes in contact with it
- Press on the “down arrow” while holding the door until the message “Door closing” disappears and the message “Ready” on the display confirm that the door has successfully been locked
- If you did not succeed, open back the door by pressing the “up arrow”, then close it again by pressing on the “down arrow”
- Press on the “Program” key on the display and select the cycle using the arrows up and down and press “Enter” to validate your choice

- Press “Start” and fill the log book with the date, the cycle number and your initials
- In case of an incomplete run, please send a ticket to the Instrument Care team with LCSB number and the error message. In such case, the lid can’t be open due to temperature security and the Instrument Care team must get involved. The uncompleted cycle should be repeated after fixing of the issue with the autoclave and or by using another autoclave.
Routine maintenance of autoclaves#
1. Systec autoclaves#
Every month or in case of spill, the autoclaves should be maintained:
- Clean the inside of the chamber and the baskets with a mild cleaning reagent and a soft cloth or sponge
- Clean the inside of the lid with a mild cleaning reagent and a soft cloth or sponge
- Wipe the gasket
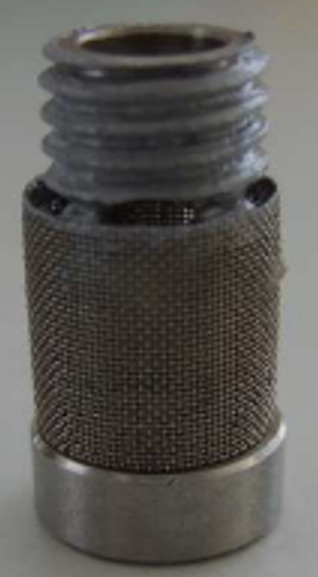
- Clean the dirt strainer: it can be taken out without tools, rinse all dirt and place it back
Systec VX-150: the dirt strainer is located in the middle of the floor
Systec DX-65: the dirt strainer is located in the back of the floor
- Indicate the maintenance done in the logbook
Every 150 cycles or so, the exhaust filter cartridge should be replace. This step is performed by the Instrument Care team. If the message appears on the display, send a ticket. At the end of the description section, include “Please notify:” and add the names of the instrument responsible person as well as the responsible backup person.
Every year, Instrument Care Team organizes a check carried out by manufacturer and inspection body.
2. SHP Laboklav autoclaves#
Every month or in case of spill, the autoclaves should be maintained:
- Clean the inside of the chamber and the baskets with a mild cleaning reagent and a soft cloth or sponge
- Clean the inside of the lid with a mild cleaning reagent and a soft cloth or sponge
- Wipe the gasket
- Indicate the maintenance done in the logbook
Every 500 cycles or so, the exhaust filter cartridge should be replaced This step is performed by the Instrument Care team. If the message appears on the display, send a ticket. At the end of the description section, include “Please notify:” and add the names of the instrument responsible person as well as the responsible backup person.
Every year, Instrument Care Team organizes a check carried out by manufacturer and inspection body.
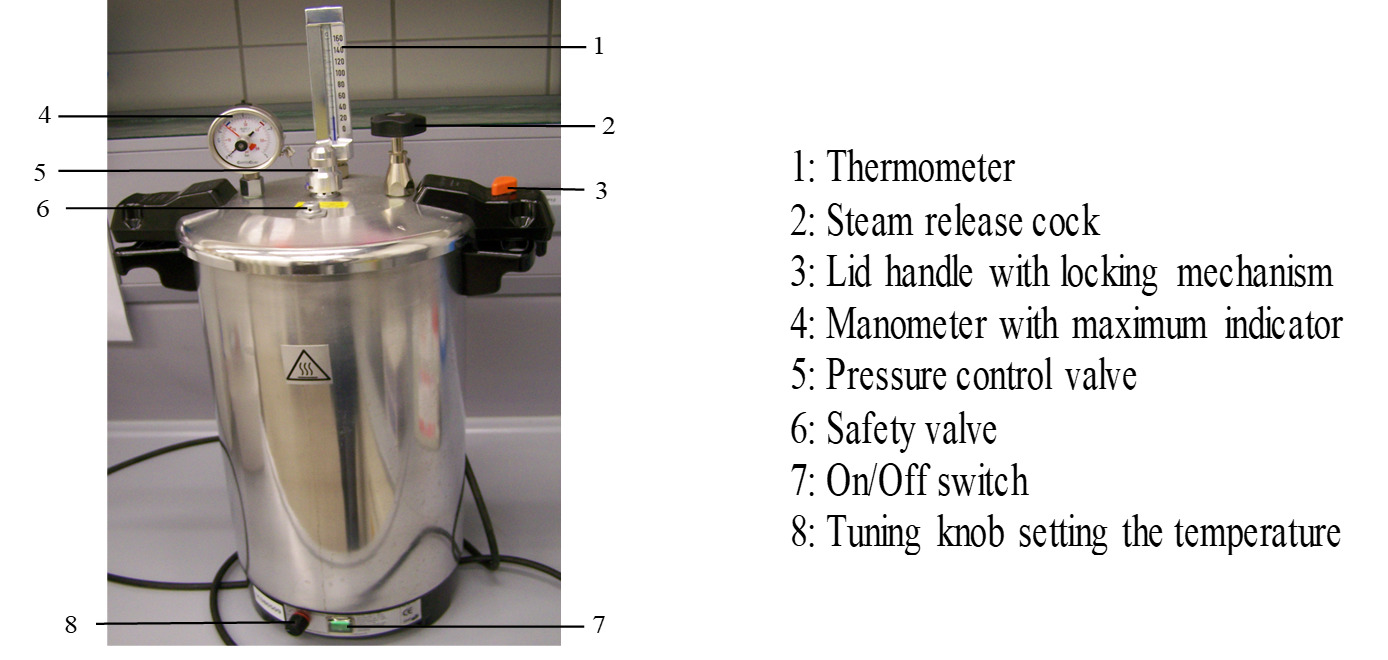
How to use Certoclav autoclave (BT1, LCSB00509)#
This instrument is designed for sterilization of liquids.
Never operate the unit without water
Never sterilize tightly sealed bottles
The casing of the appliance can reach temperature above 80°C. Use the handles and gloves when manipulating the appliance
Do not allow the steam to escape in the direction of persons
Do not operate the appliance in room where there exists a risk of explosion
- Add osmotic water to the indicated level (1-1.5L). Do not use MilliQ water, it will cause corrosion of the appliance
- Add the material to sterilize to the basket of the Certoclav. Open the lids of the bottles slightly
- Make sure the orange switch on the handles is turned towards
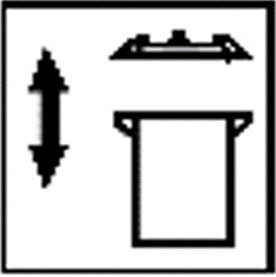
- Line up the arrows on the lid and the main body of the unit
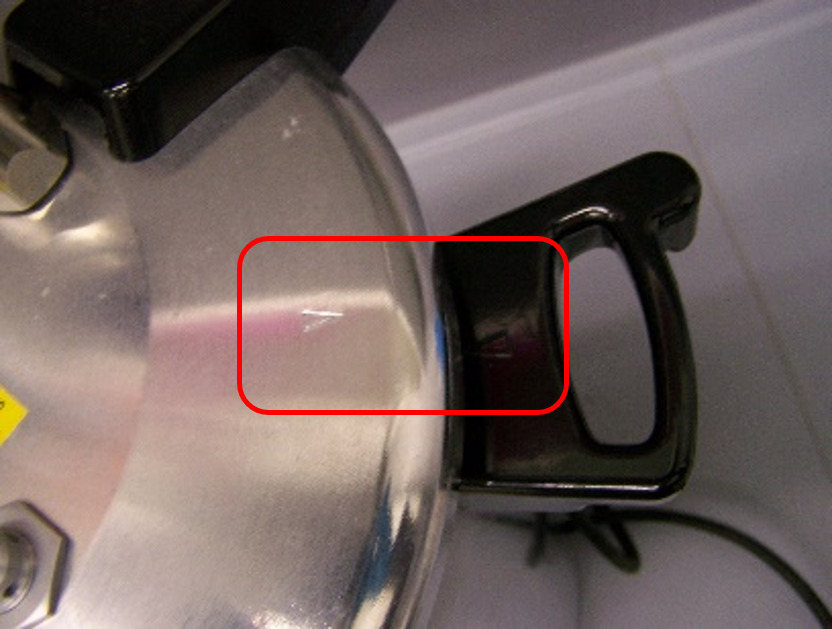
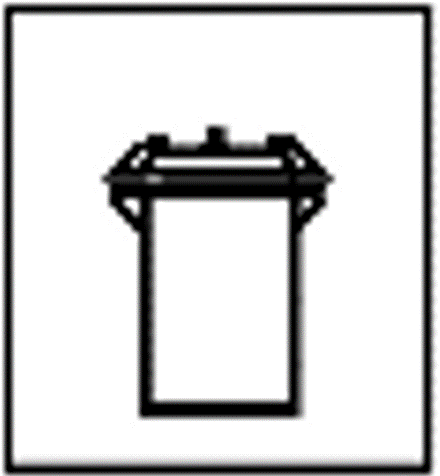
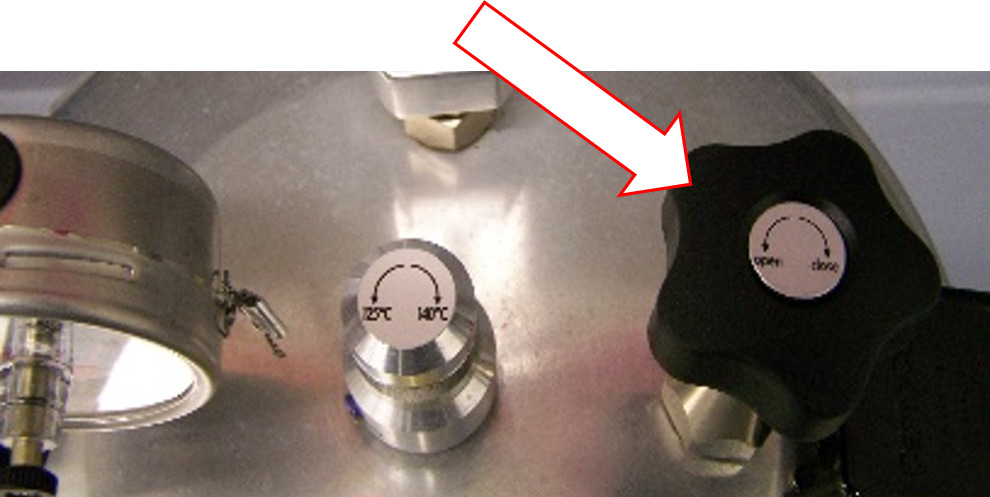
- Close the lid lightly by turning clockwise and move the orange switch to lock
- Turn the maximum indicator of the manometer to “0” (use the black screw to bring the red arrow to 0)
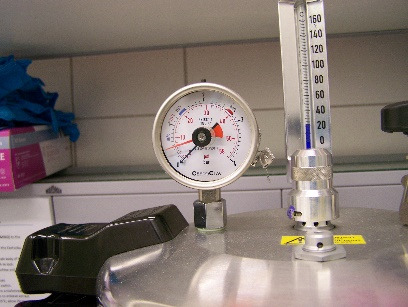
- Set the pressure control valves to 125°C/115°C by turning anticlockwise but don’t open the small screw
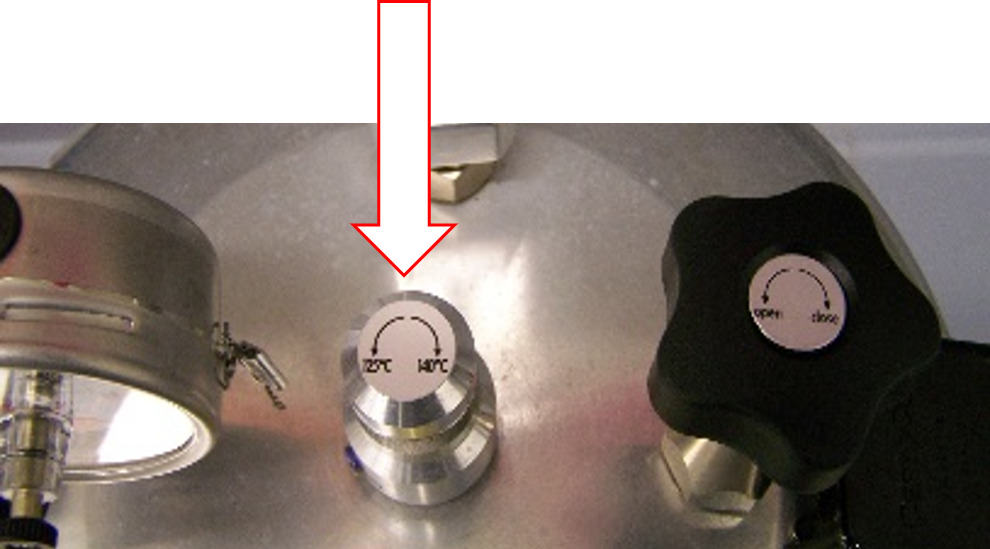
- Set the thermostat knob to 125°C
- Keep the steam release cock open (turn anticlockwise)
- Turn the Certoclav on via the green main switch
- After 10 minutes, close the steam release cock (turn clockwise)
- Upon closing of the steam release cock, it takes approximately 3 minutes for the pressure to rise and bring the unit to working temperature
- For a complete sterilization, allow the unit to run for 20 more minutes. The unit does NOT automatically stop the cycle, therefore, PLEASE SET A TIMER as extended heating can damage the unit
- Switch the unit off using the green main switch
- Check that the manometer is displaying “0”
- Allow the temperature to drop to 70°C (approximately 40 minutes, the temperature can be seen on the thermometer)
- When the cycle is done, open the steam release cock (turn anticlockwise)
- Turn the orange knob on the handle to position
- Turn the lid anticlockwise to remove it
- For each cycle, fill the log book with the date, the cycle number and your initials
Every 2 months, the appliance should be cleaned:
- Plug off the appliance and make sure that it has cooled down
- Wipe the inside and outside of the appliance with a damp cloth. NEVER immerse the lid or the chamber of the unit in water
Every 6 months, the appliance should be disinfected:
- Plug off the appliance and make sure that it has cooled down
- Wipe the inside and outside of the appliance with 70% ethanol
Every year, Instrument Care Team organizes a check carried out by manufacturer and inspection body.