LCSB File Transfer (LFT) - Quick Guide#
Overview#
LCSB File Transfer (LFT) is a tool based on IBM Aspera software that supports end-to-end encrypted data transfer and can handle high data volumes e.g. several tera bytes.
Obtaining a LFT access link#
You need an access link to use LFT. An access link is a temporary, password-protected space, much like a drop box, on LCSB file transfer server. In order to obtain an access link, you should contact your research collaborator at the LCSB-University of Luxembourg, who can request an access link for you. Once created, you will receive your access link and associated password by e-mail.
IMPORTANT NOTE: Whenever the LCSB shares a password for an LFT endpoint (collaborator), the password is transmitted via a link which will expire in one week. Therefore you should make a record of your password once you view it.
An access link can be reached via standard web browsers. Data can be transferred to/from an access link in two ways:
- Through the web browser by visiting the link, which is our recommended way of data transfer, described in this section of the guide.
- Through the use of a command line tool. If your data sits in an environment, where you can not launch a web browser, then you may use a command line client tool to reach an access link. This process is described in this section of the guide.
The use of LFT is mediated by LCSB’s data stewards. If you require assistance in using LFT, you should send an email to the LCSB data stewards or refer to the Troubleshooting section of this guide.
Accessing LFT via Web Interface#
In the following steps we provide instructions on how to use LFT web interface.
Once you receive your access link and password from the LCSB, visit the link using a standard web browser. Firefox 66.x (or higher) is recommended, but others should also work. You will be prompted for your password.

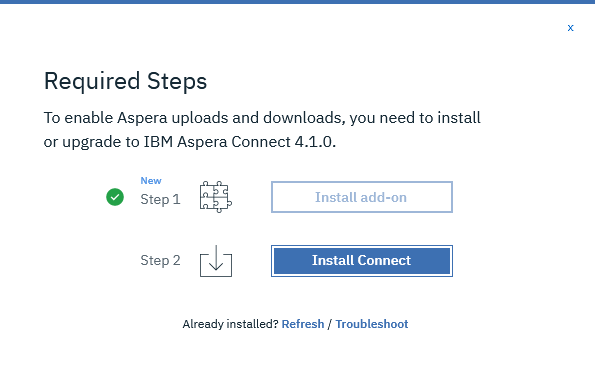
When you access an LFT link for the very first time, you will be prompted to install IBM Aspera Connect client.
click Install Connect button (see below);
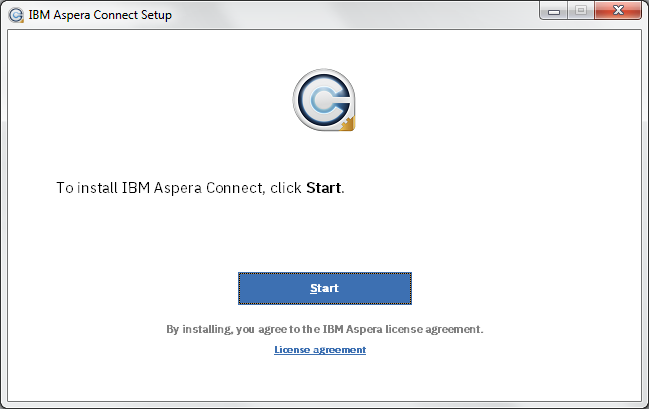
open the installer and start it;
close the installer; > depending on your Operating System the Aspera Connect can try to open and you may be asked if you are sure to open it
the prompt should disappear and you should see the following message.

The access link page will display a File Browser section. Depending on the settings per access link, users can create or delete folders in the File Browser and upload and/or download data.
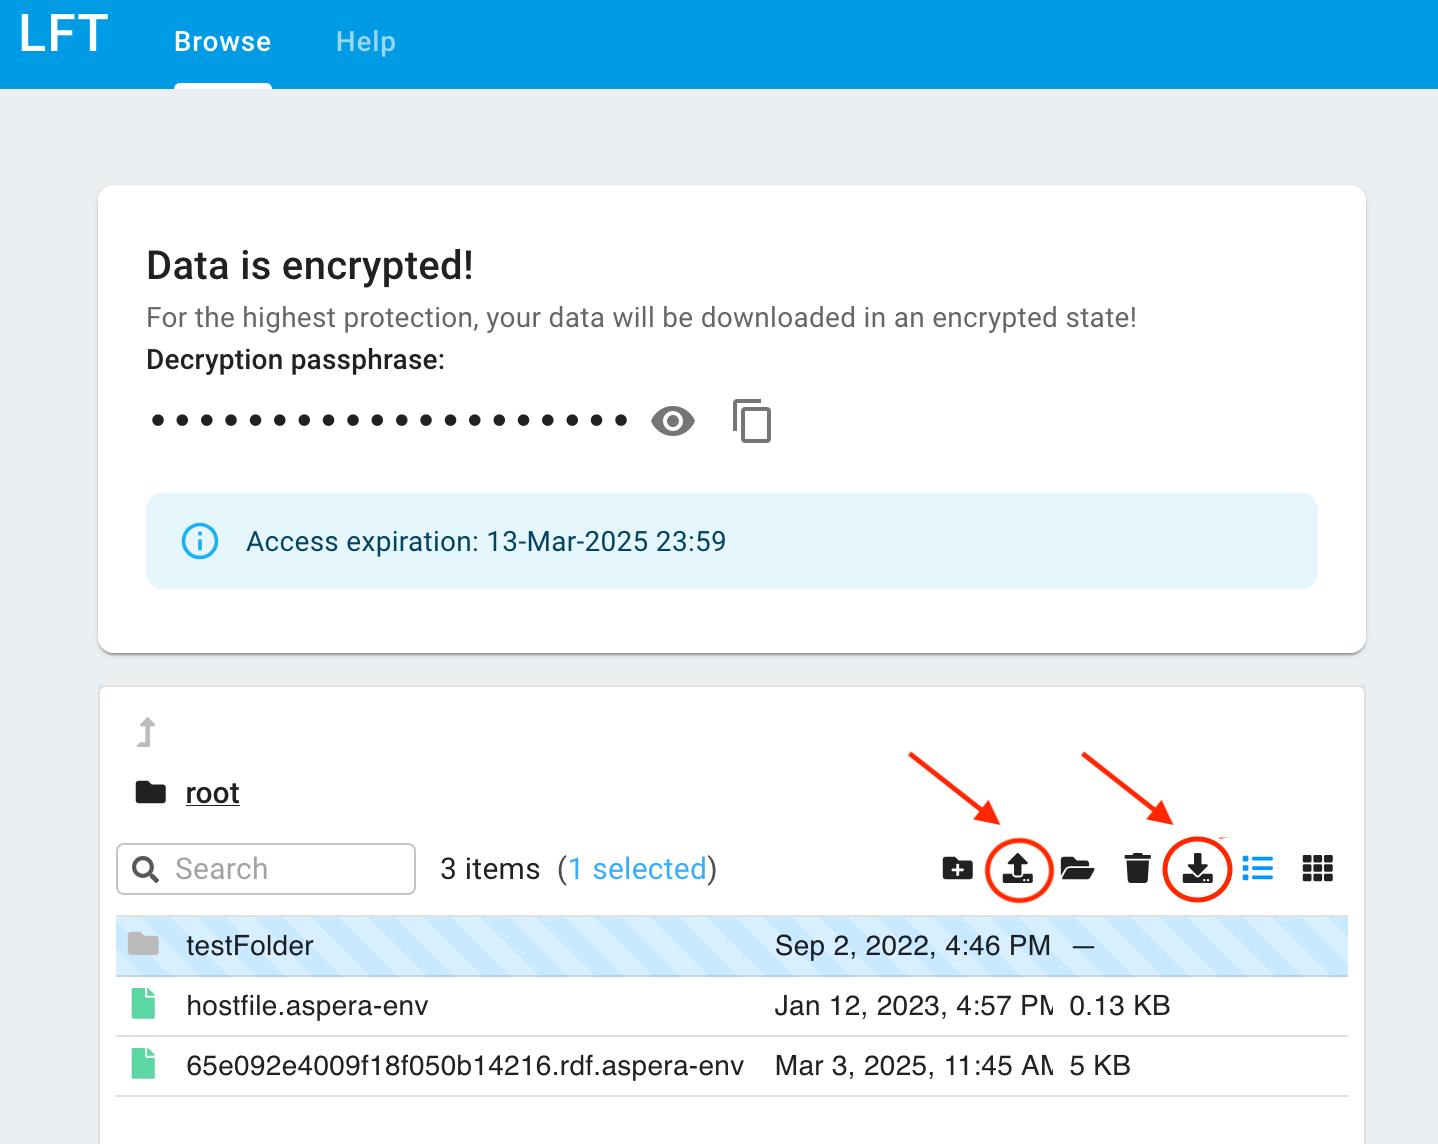
Clicking Upload or Download icons will launch the IBM Aspera Connect client on your computer. You first will be asked whether you allow the client to connect to the server. Choose Allow. > to download file/folder you need to select it first
At any time you can launch IBM Aspera Connect to display the status of uploads to or downloads from your computer.
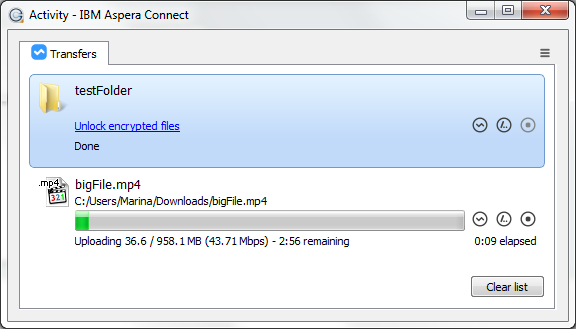
All data are encrypted on server side and they stay encrypted also upon download. For decryption, you have to navigate into your IBM Aspera Connect window and click “Unlock encrypted files”.
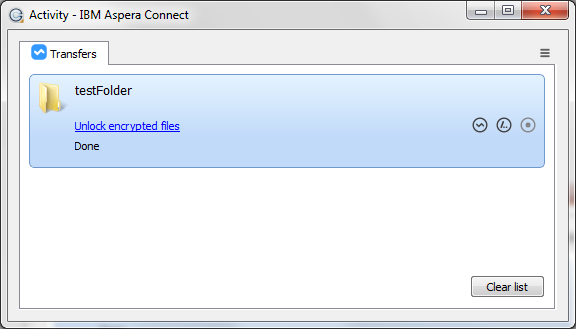
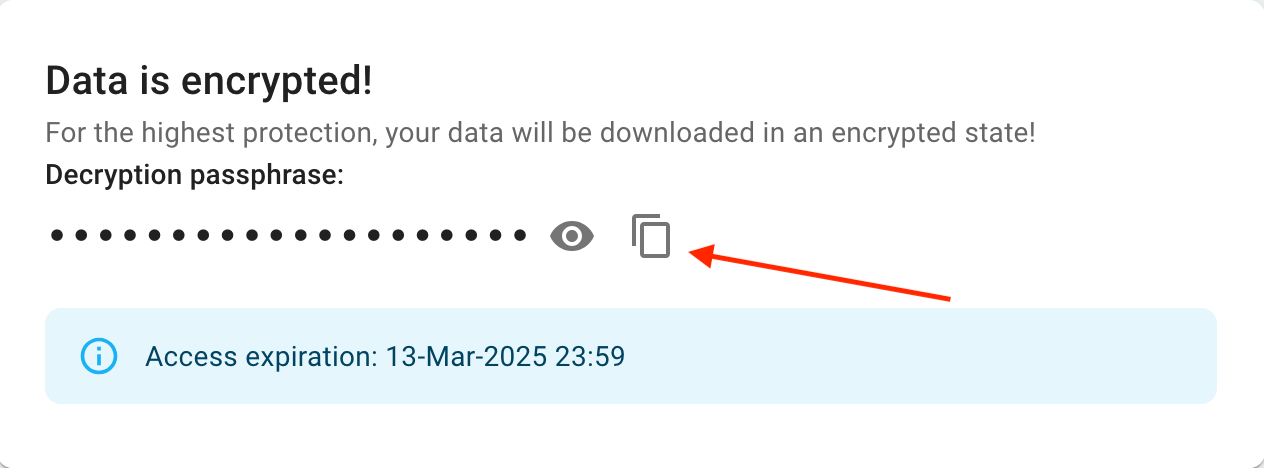
You will be prompted for encryption passphrase which is present on the file browser.
Click on the copy icon to copy into clipboard;
Insert the encryption password in the IBM Aspera Connect window.
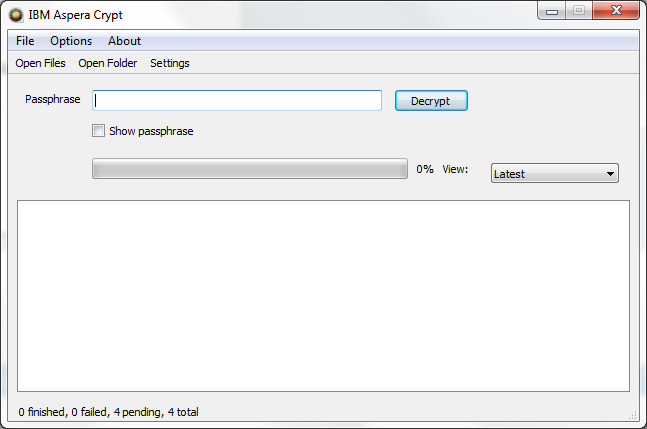
Encrypted files are by default kept on your disc after decryption. If you want to change this behaviour, navigate to Options->Settings and check “Delete encrypted files when finished” box.
- You can also navigate to the help section on the top of the browser. It contains information and links to get support.
Accessing LFT via Command-Line Tool#
In the following steps we provide instructions on how to use LFT command line.
To access LFT via command line you need to have Aspera Connect be installed (see step 2 above).
To transfer data you need to authenticate your connection. Authentication is done via SSH for which you need SSH private key. That key comes with the Aspera Connect installation and is named
aspera_tokenauth_id_rsa. The location of the file will depend on your operational system and how you installed the application. Please see the table below for the list of most common locations for different operational system:
| Environment | Location | Alternate location |
|---|---|---|
| MacOS | $HOME/Applications/IBM\ Aspera\ Connect.app/Contents/Resources/aspera_tokenauth_id_rsa |
/Applications/IBM\ Aspera\ Connect.app/Contents/Resources/aspera_tokenauth_id_rsa |
| Windows | C:\\Program Files (x86)\Aspera\Aspera Connect\etc\aspera_tokenauth_id_rsa |
C:\\Users\username\AppData\Local\Programs\Aspera\Aspera Connect\etc\aspera_tokenauth_id_rsa |
| Linux | $HOME/.aspera/connect/etc/aspera_tokenauth_id_rsa |
/opt/aspera/etc/aspera_tokenauth_id_rsa |
| HPC @ Uni.lu | $EBROOTASPERAMINCLI/etc/aspera_tokenauth_id_rsa |
Go to the help section of your access link.
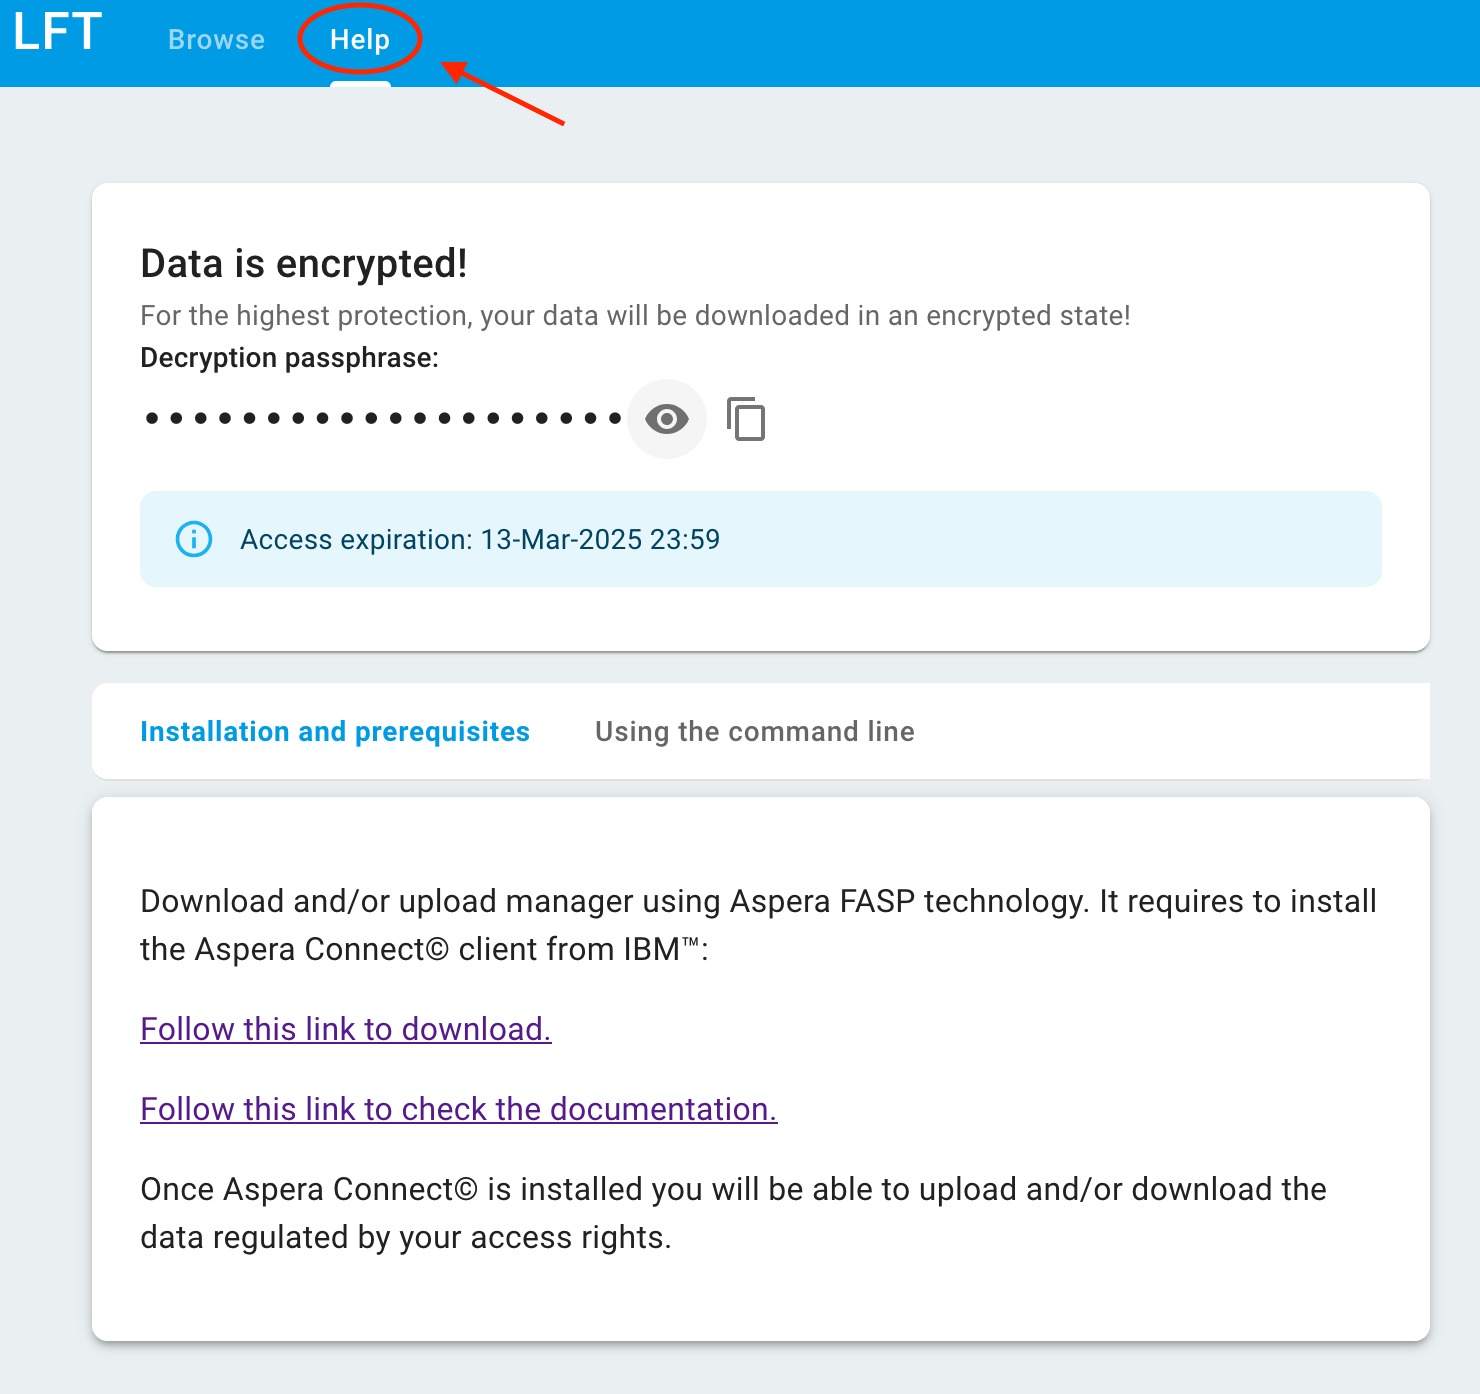
And follow the instructions there. Export the variables and execute the command to download/upload data.
Troubleshooting#
You can use the official IBM Aspera Diagnostic Tool to troubleshoot your connectivity issues.
UDP/TCP port and firewall#
IMPORTANT: Aspera requires UDP ports to be enabled on firewalls.
Specifically your firewall should:
- allow outbound connections on TCP port 9092 from the Aspera client to aspera-hts-01.lcsb.uni.lu (158.64.79.146 is the public IP) for the web interface
- allow outbound connections on TCP and UDP port 33001 from the Aspera client to aspera-hts-01.lcsb.uni.lu (158.64.79.146 is the public IP) for fasp transfer
Detailed information on how to configure firewalls when working with Aspera is given on IBM Support page.
Using Microsoft Edge browser#
Microsoft Edge browser requires to download and install IBM Aspera Connect for Edge.
Error “Passphrase doesn’t match”#
You are using wrong encryption passphrase. Check that you use the encryption passphrase from the correct link, update variables in your script, if any.
Command-Line error “command not found: ascp”#
Run ascli config ascp show to show path of ascp.
Modify command with the path instead of ascp.
Here is an example of download command
<path-to-ascp-executable> -d -i $SSHKEY -P 33001 --file-crypt decrypt -W $TOKEN $ASPERA_USERNAME@aspera-hts-01-srv.lcsb.uni.lu:/<remote-dir> </local-dir>