Contribute using GitLab web interface#
This card shows how to use GitLab to update a How-to Card.
Before you start, please make sure that you have the correct access rights to
edit the repositories in group
uniluxembourg/lcsb/sites/howto.
If you want to update any internal cards, you might even see an error message
once you try to access the repository in GitLab.
To get the access, you need a University account; with that you simply log in via https://gitlab-cloud.uni.lu. After you are registered, ask How-to Card maintainers to grant you editing access. Generally, that can be done via the corresponding ServiceNow ticket.
Starting the contribution#
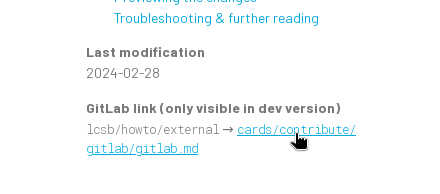
To start, find the How-to Card that you want to edit in the development previews for the How-to Cards. You can access the development previews via the following links:
(Accessing the development previews requires being logged into GitLab.)
Once you find the target card, you can follow the development link (typically found on the right side of the page) to open the given card’s source code in GitLab web interface. The link typically looks like this:
Once you get to GitLab, you should see a large blue “Edit” button with a dropdown. Press it, and pick the “Edit single file” option:
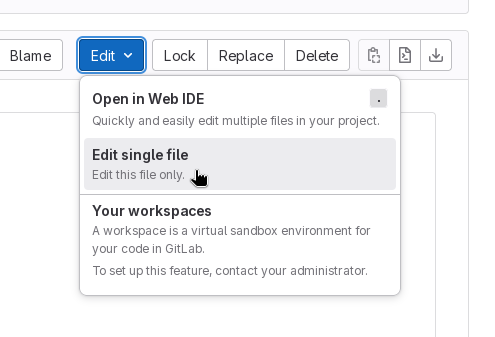
If you do not see the button, you will need to request the necessary permissions (as noted above).
Editing the card#
You will find yourself with a large editor window that contains a plaintext markdown-formatted contents of the card. You can edit the card as in any other text editor.
Once you are satisfied with your changes, you will need to commit them – i.e., make a small commented contribution object that describes the precise changes that you created.
To create the commit, simple fill in a short plaintext comment into the
Commit message field, and write a name of your target branch below
that. The name of the target branch is not important (as long as it does not
conflict with other branch names such as master, but you should generally
start it with your initials, and write a very short “identifier” of your
changes. For example, a good branch name for a commit that fixes a typo would
be e.g. jd-fix-typo (here we assumed that your name is John Doe, thus
the prefix with initials is jd-).
You also want to directly start a merge request to incorporate your changes, which is done by ticking the box below the form. In the end, everything should look roughtly as follows:
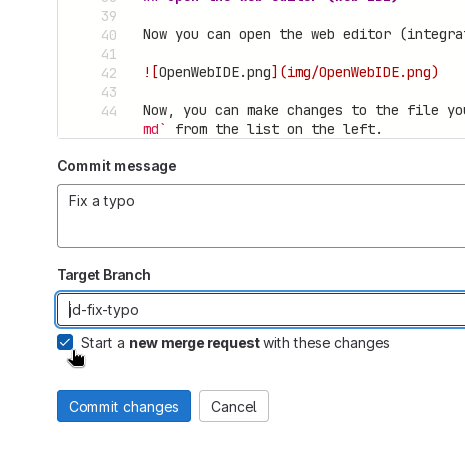
When you reach the desired state, press the Commit changes button.
Note: if you do not have write permissions for the repositories, GitLab may offer you to create a new fork with the branch. In such case, proceed as GitLab suggests – you should arrive at the same state after the fork is created.
Submitting a merge request#
If everything went right, you will see a “New merge request” form. In most cases you can simply click the Create merge request button below, and that’s it:
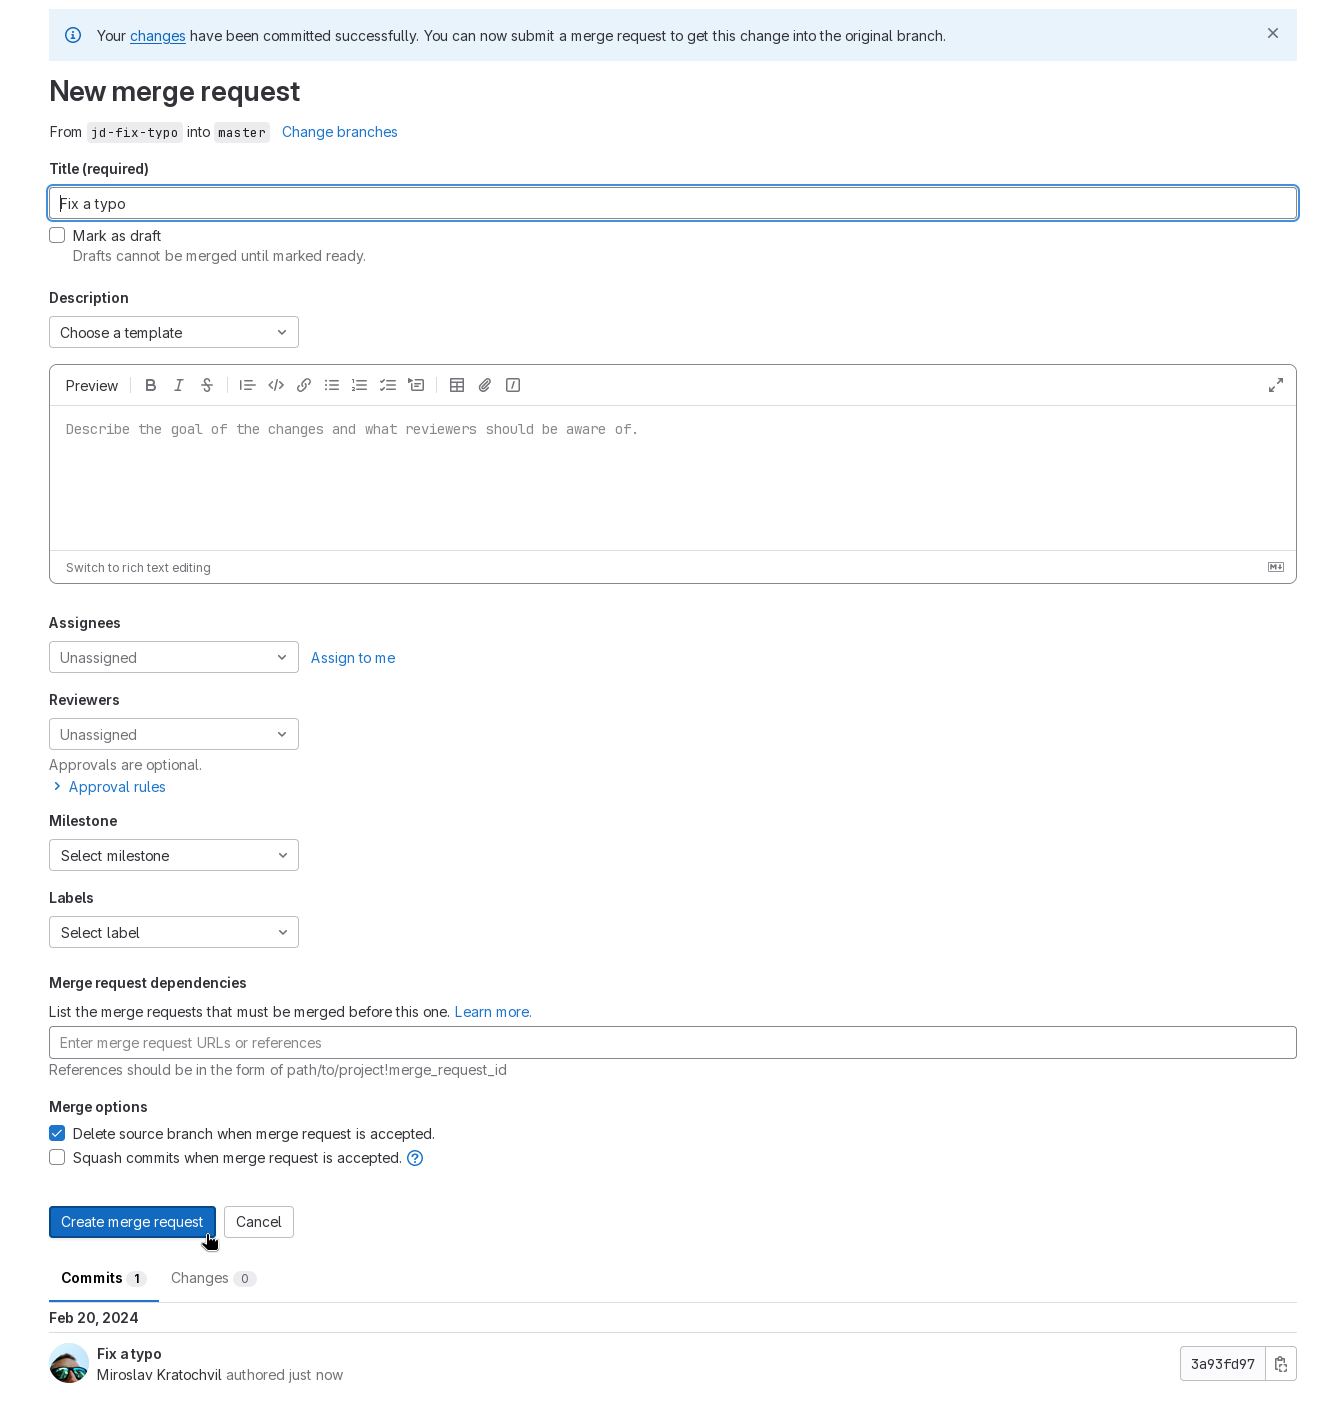
You may additionally improve the MR for the reviewers and operators by commenting upon what specifically you changed and why the changes matter, but that is not required (the changes will be displayed together with your merge request).
What happens after submitting the merge request?#
After clicking the Create merge request button, the request will be processed and eventually merged. Reviewers may typically comment on your changes in a review process; you will be notified about these via e-mail.
In case of any questions, feel free to open a draft merge request and add comments and explanations – operators and reviewers will help you to finalize the required changes into a perfect state.
When are the changes going to be published online?
The publication process involves 2 rounds of review: one in the merge request where the maintainers communicate with you, and one extra internal review of all changes just before the online release (which is done by maintainers, without direct contributor involvement).
Unless there are issues, both steps are typically finished within a few working days.
Assisting the maintainers with merge request processing#
While working on the merge request, you can Assign yourself to the merge request, which simplifies the management of multiple merge requests for the reviewers and operators, by informing them that you still work on the request. Assigning someone to the merge request means that the person takes the (informal) responsibility for what happens with the incoming changes.
Generally, you should support the work of maintainers in the following two ways:
- Once you are happy with your submitted changes, actively ask a maintainer to process your merge request (via any channel; merge request comments are preferred). Alternatively, you can simply assign a maintainer to the merge request. With that, the maintainers will know that they are supposed to “work” on the merge request, which generally means that they will do the necessary steps to publish your changes.
- If you know people who should check your changes, add them as reviewers. As a general rule, there should be at least one person other than you who thoroughly checks the merge request for common issues. Some How-to cards (especially the ones related to internal regulations) may require additional review from other responsible people. Maintainers will typically point you to the proper reviewers.
You can find the current set of maintainers in the GitLab maintainer list.
What if I need to change a How-to Card immediately?
In case changes are required to be published as soon as possible (e.g., if they reflect on mission- or safety-critical issues that need to be addressed), contact maintainers immediately via all channels. In substantiated urgent cases, the review and release process may be finished in minutes.
Similarly, if you are aware of a critical change that needs to be applied at an exact time, make sure the maintainers are informed in advance and agree on applying the change at the desired time.
Previewing the changes#
All merge requests automatically generate a “preview” version of the How-to cards installation. You can access it via the View app button on the top of the merge request page:
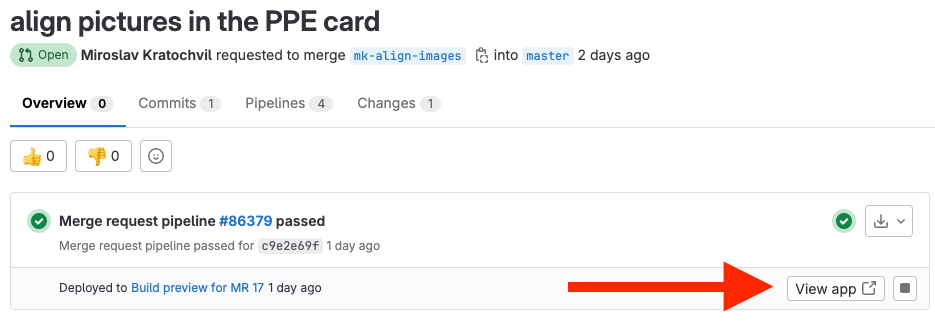
Note that you will need to wait until the “pipeline passes” (and the green check mark appears above the button). If there are any problems, the preview is not going to appear.
Sometimes, the preview button says View latest app, or does not appear
automatically – this typically happens whenever a new preview is being
prepared but the old preview is still accessible. Wait until the pipeline
passes and refresh the page (using e.g. F5) to get access to the up-to-date
preview button.
Troubleshooting & further reading#
If possible, use the GitLab commenting and issues interface to communicate about the How-to Cards contents – the communication is much more organized than via e-mail.
If you would like to understand the described workflow better, please consult our course material for Git Trilogy Part 1: Contribute using GitLab, and other cards in this category.